Showing posts with label chicken. Show all posts

Sunday, February 24, 2013

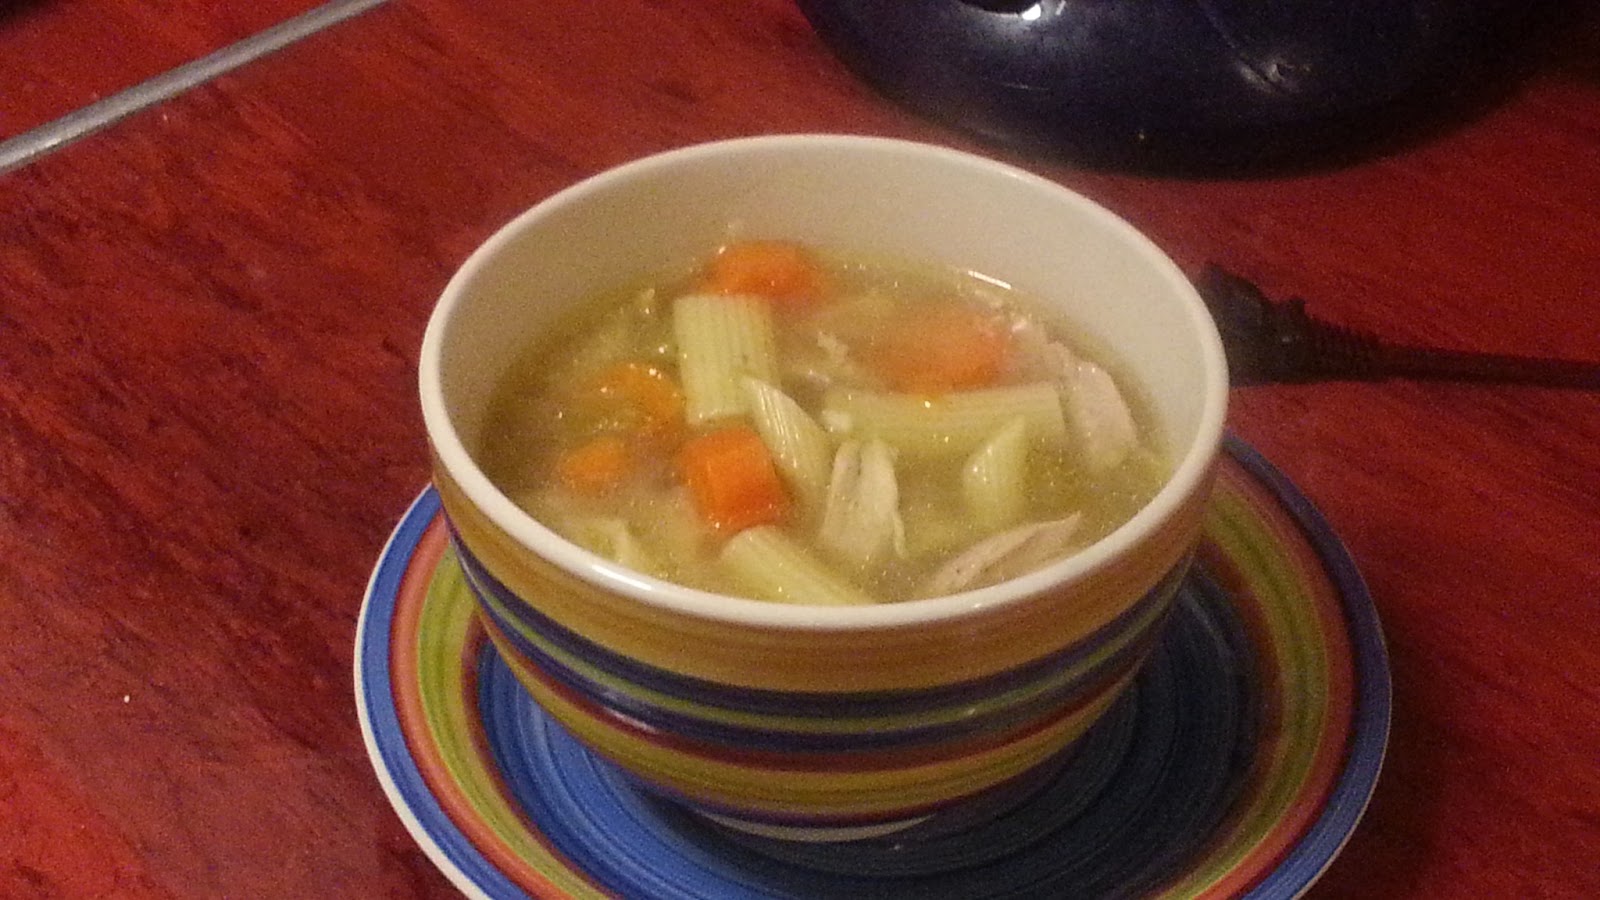
Chicken Soup

Chicken soup is good for the soul.  It's also a good way to warm up when you start thinking that spring is on the way and then Mother Nature decides it's going to snow all weekend.  Okay, so there's been little to no accumulation, but that's not the point.

I'm not sure if I've mentioned this before, but Joe hates chicken.  Naturally, I love chicken.  I've had some drumsticks hanging out in the freezer for awhile.  Joe was supposed to help a friend move after work on Saturday, so I figured that I could re-purpose my drumsticks into chicken soup and everyone would be happy.

His buddy ended up not needing any help, I still got to make my chicken soup (first time ever!), and we had a warm and satisfying dinner.

I am including a recipe for this one, but it's really not a hard-and-fast recipe.  You can add more veggies or less veggies depending on what you have or what you like.  If you have more chicken - use it.  The recipe's pretty flexible, which is what I like about it - you can make it suit your needs without impacting the taste.

I cooked my pasta directly in the soup.  This was easy, since it meant less dishes.  I did a LOT of dishes this weekend, but I guess that's what happens when you make soup, muffins and brownies (those posts coming soon!).  It also made more sense to me.  It came out great, but alas, two people cannot eat a full stockpot of chicken noodle soup in one sitting.  I put the leftovers in the fridge and when I went to have some for lunch today, there was no more broth!  Apparently, I didn't stop to think about the pasta absorbing all of the liquid.  I did some quick google-foo which told me I could add some water to my serving of leftovers when I warmed it up and that would make it more soupy and cut down on the thickness.  It works, but then the liquid doesn't taste that great - it pretty much tastes like water, since it didn't get a chance to hang out and get all the flavor like everything else did.  It was still delicious as leftovers and I'm bringing some to work tomorrow, so don't let that deter you.  However, the easiest remedy for that is to cook your pasta separately and then pour the soup over the pasta for each individual serving.  When you put the leftovers away, keep them in separate containers and warm them up the same way.

Either way, for my first time making chicken soup, I would classify this as a huge success!   For some reason, even though chicken soup was so easy to make, the fact that I did it makes me feel really accomplished.  I think it's the Jewish gramma in me.. now, when I'm sick, I don't have to call my mom or my gramma - I can do it myself!  When other people are sick, I can make them feel better.. or at least feed them something yummy! I've been wanting to learn how to make soup for awhile, so now that I know I can do it, I'm excited to try other kinds - chowder, cream of broccoli, baked potato.. I'm looking at you!

What's your favorite kind of soup?

Chicken Soup
To print this recipe, click here

1 lb. chicken drumsticks (I used 6 of them)
7-8 carrots, peeled and chopped
4 stalks celery, chopped
half an onion, diced
2 tsp. minced garlic
3 chicken bouillon cubes
1 tsp. parsley flakes
2 bay leaves
half box of pasta, uncooked

Combine all ingredients in a large stock pot.  Fill the stock pot with enough to water to completely cover all of the ingredients, with enough room for everything to move around once the water starts boiling.  I filled my pot to about an inch from the top.

Cover the pot and let everything boil on medium-high heat for about 30 minutes.  Turn off the heat and remove the chicken.  Once chicken is cool enough to handle, take the meat off the bone.  Cut or chop the meat into bite-size pieces and return to the pot.  Cover and simmer over low heat for 1-2 hours.

When ready to eat, bring the soup to a boil and add noodles directly to the soup.  Alternately (and this is a better option if you're planning on leftovers), cook pasta separately.  When ready to serve, put pasta in a bowl and pour the soup over the noodles.  Store leftovers separately in the fridge.


Tuesday, February 12, 2013

Chicken Pot Pie


I made chicken pot pie this weekend.  Correction: I made TWO chicken pot pies this weekend.

If you’ve been paying any attention to the news, you saw that there was a big blizzard in my part of the world over the weekend.  Nemo dropped about 30 inches of snow on us, which is perfect weather for staying inside and not doing anything, especially when the Governor puts a  driving ban in effect that could land you in jail for a year if you’re not part of the elite group of people to whom the rule does not apply.

So, anyway, on Saturday, Joe and I played in the snow (for like 5 minutes, because it was up to my waist) and ate some leftovers for dinner.  We had my brother over on Sunday and I really wanted to make a nice warm and filling dinner.  Josh told me he didn’t like chicken pot pie, but I forgot to separate and individually wrap the chicken breasts when I froze them, so I decided he’d get chicken quesadillas instead.

For this recipe, a lot of the ingredients are approximations because I didn’t really measure that much.  I normally wrap the chicken breasts individually and then freeze them so I can use one at a time (Joe doesn’t like chicken that much), so if you’re using pre-frozen or already thawed chicken breasts, you probably only need one big one or two smaller ones.  I had three frozen ones and I cooked them all together, shredded them into a huge bowl and divided it out accordingly.

I’ve made chicken pot pie from scratch before, but this is the best one I’ve ever made.  Normally, I use the crescent roll dough for the crust, but because of the snow storm, I wasn’t going to the store for anything that wasn’t a necessity. We were able to drive again on Sunday, but I was pretty sure the shelves were still going to be empty.  I had everything else I needed, so I just used a basic pastry dough recipe for the crust.  Let me tell you: a million times better than the crescent dough! I also used a can of cream of chicken, but the water I used was really the broth that I got from cooking the chicken, and then I added a splash of milk to make it creamy.  I didn’t save the broth that was left because I wasn’t really sure what to do with it, but you could always freeze it and then use it for soup or a roasted chicken or something.

Onward!

Chicken Pot Pie

To print this recipe, click here


For the filling:

1-2 chicken breasts
3 cubes of chicken bouillon
2 cups diced carrots
2 tsp. minced garlic
1 bag frozen corn
Garlic powder, to taste
Celery salt, to taste
Onion salt, to taste
1 can Cream of chicken + ¾ can broth from cooked chicken + ¼ can milk
(cook’s note: this gave me enough filling for two 9 inch pot pies!)

1.      Put the chicken breasts, carrots, minced garlic and bouillon cubes in a large pot.  Fill with enough water to cover everything.  Put the cover on the pot and put on medium-high heat.  Boil until chicken breasts are cooked through, about 30 minutes.  In the last 10 minutes, add the frozen corn to the pot.
2.      Remove chicken only from the pot.  In a large bowl , shred chicken by using two forks and pulling the forks in opposite directions.
3.      Strain the vegetables, making sure to reserve the broth in a separate bowl.
4.      In a large pot, combine the shredded chicken, vegetables, spices and cream of chicken.  Stir until combined.  Heat on low just until everything is warmed thoroughly.  The mixture should resemble a creamy soup.  Remove from heat.

For the dough:
1 ½ c. flour
¾ tsp. salt
½ tsp. baking powder
¼ c. vegetable shortening
¼ c. cold butter, diced
¼ c. cold water
1 egg, lightly beaten

1.      In the bowl of a stand mixer fitted with the flat paddle attachment, combine dry ingredients.  Add in butter and shortening and stir until mixture is crumbly. 
2.      Add enough cold water to make the dough start to stick together (you may need to add more, but I found ¼ cup perfect).  Knead in bowl until you can form a ball.
3.      Divide the dough into two smaller balls and refrigerate for 30 minutes.


Putting it all together:
1.      Preheat oven to 425°F.
2.      Roll out one dough ball so that it’s large enough to fit your pie pan.  This will be your bottom crust.  Place dough in your pie plate, cutting off any excess and adding it to any places that have holes or need some extra dough.  Pinch the edges so that your crust doesn’t shrink too much.
3.      Bake for 5-8 minutes, just enough for it to not get soggy and fall apart when we add the filling. 
4.      Let the pie crust cool for a couple of minutes, then spoon in the filling.  NOTE: I HAD ENOUGH FILLING TO MAKE TWO POT PIES.
5.      Roll out your second crust.  Place it over the filling, then seal the edge.  Brush the top with the beaten egg.  Cut three slits over the top of the crust for some ventilation so your yummy pot pie doesn’t blow up all over the oven.  Bake for 30-40 minutes, until crust is a deep, golden brown color.  Make sure to check on it about halfway; if the outer edges of the crust are already the perfect color, you will need to pull the pie out and cover the edges with foil (carefully – this pan is hot!) to prevent burning.  Let stand 5 minutes before serving.


Sunday, February 3, 2013

Baked Buffalo Chicken Bites

At this point, the Superbowl is only hours away.  (Yes, I'm really writing this at 7am on a Sunday.)  IF you're having people over later, you're probably running around like a lunatic trying to put everything together and make sure you have everything you need - beer, food, toilet paper, etc.  You might also be making some last minute food... or scrambling to find one last thing to make.  Fret not, my friend, these buffalo chicken bites are easy to make AND they taste delicious! OK, so putting them together and getting them ready to cook is a little time consuming, but it's really worth it. Plus, they're baked, not fried, so you can clean up while they're in the oven and feel good about serving your guests something that's moderately healthy.

I made these back at the beginning of football season and I haven't had a chance to make them since.  Mostly, Joe doesn't really like buffalo chicken, but he liked these. Well, liked them enough to eat a couple, but he didn't like them enough for me to justify making 30 of them.  They're crunchy and spicy and the ranch dressing pairs perfectly (you can use blue cheese if you like that better, I'm personally not a fan).  They heat up decently in the microwave and make a tasty lunch the next day, though, so don't worry if you have leftovers.

Note that the recipe calls for using crushed up corn flakes instead of regular breadcrumbs.  If you have regular ones you can definitely use them instead, but the balls will be less crunchy.  At the very least, I would suggest panko crumbs so that you can get some of that crunch.  If you have a food chopper/processor or a blender, crushing the corn flakes is really easy.  If you have a child and/or someone who likes to smash things, it's also really easy - just put the cornflakes in a sealed plastic bag with all the air out, hand them a rolling pin and let them go to town!

Also, a note on the shredded chicken: I used 2 chicken breasts, boiled them in water until they were cooked through, then used two forks to shred them.  If you're short on time, you can use one of those store-bought rotisserie chickens, instead.  If you go that route, you'll just want to remove the skin first.

Now that the intro's out of the way, let's get down to business.

Baked Buffalo Chicken Bites
To print this recipe, click here


Ingredients
3 cups cooked, shredded chicken
1/2 cup Frank's Original Red Hot (more or less to taste)
3 1/2 oz. brick cream cheese, softened
2 cups shredded sharp cheddar cheese
1/4 cup green onion
1 cup flour
4 eggs, lightly beaten
4 cups crushed corn flakes

Method
Preheat oven to 350°F.  Line a large baking sheet with parchment paper.  Set aside.

In a large bowl, mix the chicken, cream cheese and hot sauce until combined.  Stir in the cheddar cheese and green onions.

Roll the chicken mixture into 1 1/2-2 inch balls.  Put them on a plate or a separate, unlined baking sheet until ready to dip.

Set out the flour, eggs and corn flakes in three separate bowls.  Dip each chicken ball into the flour, then the egg, and then the cornflakes.  Place them onto the prepared baking sheet.

Once all of the balls are dipped, bake for 20-25 minutes, until golden brown on the outside.  Serve warm with ranch or blue cheese dressing on the side for dipping.