Showing posts with label chocolate. Show all posts

Sunday, April 5, 2015

Kosher for Passover: Chocolate Cake (Gluten Free, too!)

Happy Easter/Happy Passover/Happy spring holiday of your choosing!  I'm just happy that the sun is finally out and the temperature is warming up - I've got the window open a tiny bit as I write this and it feels wonderful!

Our family Passover Seder was on Friday.  Naturally, mom asked me to bring a dessert.  I was originally going to go with my old Passover-standby of Apple Matzah Kugel, but decided I really wanted to step outside the box.

Joe's mom is gluten free, and I vaguely remembered making a chocolate cake for her birthday back in September.  I knew the cake itself was gluten free, but I couldn't quite remember if it had any leavening agents in it (baking soda/powder, etc). though I do remember thinking that it was delicious.  I managed to dig up the recipe from my stash, and, lo and behold, it's kosher for Passover!


It's actually the perfect recipe if you know someone who has any type of wheat allergies.  There is no flour whatsoever called for in the recipe, so you don't have to try and switch it out to something that can be eaten.  Since it doesn't call for any flour, you also don't have to try and sub it out for any kind of matzah meal, which means it doesn't end up tasting faintly of matzah like most homemade Passover desserts do.

This is a mousse style cake, so it's really super light and fluffy.  I served it topped with a little bit of homemade whipped cream, but a light dusting of powdered sugar would be sufficient, too.  This came out slightly different than the way I originally made it, but I liked it better this way, I think.  When I made it the first time, it was really dark chocolately and super rich.  This time, I used two different kinds of chocolate, which gave it a more well-rounded flavor.  When I made it for Joe's mom's birthday, the cake sunk a little, but it was the whole cake that sunk - this time around, the middle sunk more and the edges stayed where they were.  That probably has more to do with the temperature in my apartment than with anything else. 

As you can see from the photos, I had a hard time slicing and serving the cake in the way I wanted to.  I melted the butter and chocolate in the microwave instead of using the double boiler method, so that may have changed the consistency just enough to make my cake a little less stable.  I had left this on the counter overnight, but next time, I'll probably try putting it in the fridge or freezer to see if that makes serving it any easier.

If your family is anything like mine, they won't care what it actually looks like - they'll just be thrilled to be eating a dessert that tastes like "regular food"!

Kosher for Passover (and Gluten Free) Chocolate Cake


8 oz. unsweetened chocolate
2 sticks butter
8 egg yolks
1 1/4 c. sugar
5 egg whites

Preheat oven to 250°F.  Grease an 8" springform pan and set aside.

Using the double boiler method, combine butter and chocolate and stir until melted.

In a large bowl, combine the egg yolk and sugar.  Mix until the eggs are a light yellow color.

Slowly add in the chocolate sauce and stir to blend thoroughly.

In a separate bowl, beat the egg whites until stiff.  Add half of the egg whites to the chocolate mixture and beat until combined.  Fold in the remaining egg whites.

Pour batter into the pan and bake for one hour and fifteen minutes (75 minutes).  Remove cake from oven and set on a wire rack to cool.

Sunday, February 8, 2015

Bridal Shower Cupcakes

No recipe for this one today, folks.  Just a nice little story and a few photos.

My friend Sarah is getting married in March.  On Pi day, in fact (that's 3/14/15 if you're wondering).  Sarah and I haven't been friends for super long - maybe about a year, give or take.  Actually, we met on our wedding planning website, Offbeat Bride (shameless plug).  I was on the local forums and she seemed cool, so we became Facebook friends so we wouldn't spam everyone else with our conversations.  And then we took a workout class and we got to be real life friends.

Funny how life works sometimes, isn't it?

She had mentioned her upcoming bridal shower a few times, but I didn't ask if there was anything I could do to help because I didn't want to be the asshole that assumed they were invited when they really aren't.

Then one day I got an email from one of her bridesmaids, asking me if I could make cupcakes for the party.  Alas, there was one little hitch - Sarah has asked that they look like a wedding dress.  I said I absolutely could do it, no sweat.  Then, I started Googling.

Thankfully, it was actually pretty easy.  I just had to make my cupcakes like normal and then arrange them into the shape of a wedding dress.  No problem, right?  HAHAHAHA.  Getting the shape right was about a million times harder than I had anticipated.  It got to the point where I was texting OTHER friends photos and asking if it looked the way it was supposed to.  One of my suuuuuper helpful friends even went so far as to say "sure... if they were white!" Thanks for that helpful advice, my dear (yeah, I'm looking at you).

Sarah's colors are blue and silver, but I knew I wanted to leave the frosting white.  I ended up getting a silver colored posterboard and a strand of blue adhesive gem thingies at the craft store.  The gems were on some flexible backing, so it was easy to shape them around the cupcakes to make it look like a sash.  I don't generally bake for complete strangers, so I was a little nervous but totally excited - this was my first real shot at making Elfie's Edibles an actual thing!  I definitely shouldn't have been, since everyone told me that they looked and tasted great.  For as quickly as they got gobbled up, I'm sure these were real compliments.

This was super fun and a little time consuming, but totally worth it.  Congratulations, Sarah (and Shawn)!


Sunday, May 18, 2014

One Banana Cake

One of my guilty pleasures is frosted banana cake.  It's one of those pre-packaged cakes that you can buy at the store.   I don't want to say the name, but it's white with blue script.  There are a few problems with loving this frosted banana cake.  For one, when I can find it, it's super expensive.  Notice how I said "when I can find it"?  Yeah, it's basically impossible to find.  I think it's one of those flavors that they only have for a "limited time" and then they bring it back for awhile just to put it in hiding, etc.

LAME.

For awhile now, I've been trying to recreate it.  The problem is that it's pretty tricky because I have NO IDEA how they flavor the frosting.  The frosting is part chocolate, part banana-ish but not really banana.  Probably it's fake banana flavor and that's why I can't recreate it.  Instead of trying to recreate the wheel, I thought that I could put the same flavors into something uniquely my own.

But, as we all know, the only time you can actually eat all of the bananas before they start to go brown is when you're planning to use them.  Plus, Joe gave me an awesome tip for helping to slow down the ripening process: put something over the top part of the bananas where they all connect!  You can use plastic wrap, but I used foil since that was all I had.  It worked great - they didn't start browning until after I started eating them, and I just re-tightened the foil every time I took a banana.  Obviously, it's not totally preventative, but it will at least get your bananas to make it through the week so you can eat them!

Last week, I found myself with one lonely, measly banana left on the counter.  It was brown and squishy - perfect for baking.  But, I didn't want banana bread or cupcakes and I didn't really feel like making cookies.  So, I decided to try to make a banana cake.

You guys.  It came out perfectly!  The chunks of chocolate were slightly melty and soft and offered a nice contrast to the bananas and cake.  It could have used more banana to increase that flavor a little bit, but hey - I had to work with what I had!  I just finished the last 4 few small slices, and they are perfect with a cup of coffee on a quiet Sunday morning.


Banana Cake

1 c. flour
1 tsp. baking powder
1/4 c. butter, room temperature
1/3 c. granulated sugar
1/3 c. brown sugar
1 tsp. vanilla extract
1 banana, mashed
1 egg
1 c. chocolate chips

Preheat oven to 350°F.  Grease an 8" x 8" cake pan and set aside.

In a medium bowl, beat butter, sugars and vanilla until creamy.  Add banana and eggs.  Stir in flour and baking powder until combined.  Fold in chocolate chips.

Bake 20 minutes, until top is lightly browned and a toothpick inserted into the center comes out clean.  Top will be slightly moist when pressed.   Remove from oven and let cool completely before cutting.

Sunday, April 13, 2014

Kosher for Passover: Chocolate Chip Cookies

Passover is literally hours away, and I started cooking some things yesterday.  I've probably mentioned this before, but now that I have a real grown up job, it's difficult for me to bake and cook during the week, so I try to do what I can over the weekend.

If you're anything like me and my family, you find that the hardest part about Passover is noshing, or finding a good snack.  Sure, I have 2 containers of macaroons in the closet, and yeah, they're alright, but after a few days of them? Bo-ring!  The only problem is that those box mixes or pre-packaged things are equally pretty terrible.  Sometimes, the flavor is there, but man, they're so dry!


I cobbled this recipe after finding some online that had things about them I didn't like or couldn't use.  Like flour.  Since I'm writing this on Sunday morning, my family has yet to try them.  However, I ate a few yesterday - quality control and all that - and I was pleasantly surprised.  While they don't quite taste or behave like your normal cookies, these are the best tasting Passover cookies I've ever had.


Let me say that again, just so we can be clear: do NOT compare these to your favorite, everyday chocolate chip cookie recipe.  If you compare them to that recipe, they will fall far short of your expectations.

However, if you look at these compared to other Passover treats, you will be pleasantly surprised.  Yes, you can still taste the matzah, but for me, it's more of a muted, nutty flavor than an actual matzah flavor.  I made some of these as chocolate chip cookies and some as double chocolate chip cookies, and while the flavor is a bit more muted in the double chocolate, you will not get rid of it altogether.  Frankly, I gave up trying to hide the matzah flavor years ago.  I don't really mind the taste of matzah, so why hide it when I can embrace it instead?

These aren't going to bake up or behave quite like your regular cookies, either.  You can fit more of these on a pan because they don't really spread out.  I used my cookie scoop, and they pretty much just stayed in that round ball shape.  To remedy this, I just gently tapped them with the bottom of a glass.  You can do this before or after they come out of the oven.  Out of the oven is a little easier, though you may want to grease the glass a little bit just to make sure you don't lose any good chocolate chips.

Also, if you don't have molasses in your cabinet, no big deal.  You can substitute the granulated sugar + molasses combination for the same amount of brown sugar (in this case, 1 1/2 cups).  The flavor will be the same, but I found that the molasses gave the cookies some extra moisture that was lacking when I used just brown sugar.  If your family prefers nuts in their cookies - go ahead and add those too!  The great part about this is that it's pretty customizable to whatever tastes and flavors you prefer.


I am sure my family will enjoy these, and I hope your family does, too.  Chag Sameach!

Kosher for Passover Chocolate Chip Cookies

2 sticks butter, room temperature
2 Tbsp honey
2 tsp vanilla extract
1 1/2 c. granulated sugar
3 Tbsp molasses
2 eggs
1 1/2 c. matzah cake meal
1/4 c. matzah meal
10 oz. bag (2 cups) kosher for Passover chocolate chips

Preheat oven to 350°F.  Grease cookie sheets and set aside.

In a large bowl, combine butter, honey, vanilla, sugar and molasses until smooth and creamy.

Stir in the eggs and mix well.

Add cake meal and matzah meal; stir until combined.

Fold in chocolate chips.

Drop by rounded teaspoon onto prepared cookie sheets.  Bake 10-12 minutes, until cookies are set and tops are lightly browned.  Remove from oven and gently tap cookies with the bottom of a glass to round them out.  Let cool for a few minutes, then transfer to a wire rack to cool completely.

Pour a tall glass of milk and enjoy!

Tuesday, January 21, 2014

Triple Chocolate Chip Cookies

By now, it should be a well known fact that I'm a chocoholic.  If it's got chocolate, I'm interested.  At the same time, Joe is pretty much the human version of Cookie Monster.

So, what do you when you're craving something seriously chocolatey and you know that your future husband would like something in cookie form?

Make these babies.

Chocolate cookies with semi-sweet, white chocolate and dark chocolate chips.  Go ahead and pour yourself a tall glass of (chocolate) milk to go with them - you'll need it.  YUM.

I told Joe that I only made a half batch of these because I wasn't sure if he would like them (turns out there is such a thing as "too chocolatey"), but I really only made a half batch because I knew I would literally inhale these.  It's too bad, because now I wish I had more.

Guess I'll have to make some!

Triple Chocolate Chip Cookies

1 stick butter, room temperature
1/2 cup sugar
1/2 cup brown sugar
1 egg
1 tsp vanilla extract
1 tsp baking soda
1/4 tsp salt
2 Tbsp unsweetened cocoa powder
1 1/2 c. flour
1/2 c. white chocolate chips
1/2 c. milk chocolate chips
1/2 c. dark chocolate chips

Preheat oven to 350ºF.  Grease cookie sheets and set aside.

Combine all ingredients except for flour and chocolate chips.  Mix in flour until combined.  Fold in chocolate chips.

Drop by rounded teaspoon onto cookie sheets (I used a cookie scoop that makes cookies 2"-3" diameter).  Bake for 9 minutes.  Allow cookies to cool for a few minutes on cookie sheets, then transfer to a wire rack to cool completely

Saturday, January 18, 2014

Banana Oatmeal Chocolate Chip Cookies

I'm sure I've mentioned my love/hate relationship with bananas before.  Mostly, I just have trouble eating them before they go bad.  In theory, this is no big deal, because I love turning my rotten bannas into something else.  In practice, though, it's kind of annoying, because I never know what else to make besides banana bread.  And, while I LOVE banana bread, there are only so many variations you can make of it before that gets boring, too.

These cookies are a mouthful... literally.  I've made these a few times and every time, I try to think of an easier name for them, but I keep drawing a blank.  The name is a lot to say, but they're so easy to make that it's definitely worth it.  I'm pretty sure that my brother has eaten an entire container of these by himself without thinking twice about it.

For me, these cookies are perfect as a snack, but I've been known to have a few (or maybe 5 or 6) for breakfast.  I'm probably just deluding myself into thinking that the oatmeal makes these way healthier than they are, but all things considered, I'm pretty sure these are pretty decent. I mean, oatmeal's good for you!

What helps me feel better about it, right?

The awesome part about this recipe is that you can pretty much make any substitutions you want and you'll still get something delicious.  I normally use regular all-purpose flour and old-fashioned oats, but I've also made these with whole wheat flour and quick oats.  Making it this way, you get a little bit of a wetter batter, but no discernible taste difference.  I also like to substitute dark chocolate chunks or chips instead of semisweet chips.  While they taste good, I find that the dark chocolate tends to mask or overpower the banana flavor.  Nest time, I might do a combination of dark chocolate and semisweet chocolate chips and see what happens.

You'll notice that the cook time on these is a little bit longer than the cook time on pretty much any other cookie I make.  The banana makes these cookies really moist which does two things: first, it means they can hang around for a little longer before they're get too dry and stale.  Second, it means you end up with a really wet batter that takes a little longer to cook!  Fret not, though, because even though you're cooking them for about 10 minutes, you still get a really moist and chewy cookie with a TON of banana and chocolatey flavor.

What's your favorite thing to make with bananas?

Banana Oatmeal Chocolate Chip Cookies
1 1/2 stick butter, softened
1 1/2 ripe bananas
1/2 tsp. baking soda
1/2 c. granulated sugar
1/2 c. brown sugar
1 egg
1 tsp. vanilla extract
1 c. flour
2 c. old fashioned oats
2 c. semisweet chocolate chips.

Combine all ingredients except flour, oats and chocolate chips. Stir in the flour, then the oats, then the chocolate chips. Batter will be wet.

Drop by rounded teaspoon onto greased cookie sheet.

Bake at 375°F for 10 minutes or until the tops of the cookies are dry. Let cool on cookie sheets for two minutes, then transfer to wire rack to cool completely.

Try not to eat them all in the meantime!

Tuesday, January 7, 2014

Peanut Butter Blossoms

You've probably seen these a million times recently, since lots of people make these for Christmas.  Hell, you've probably even made them yourself.  I, on the other hand, have made these exactly twice in my entire life.  The first time I made these, Joe still live in his dingy bachelor pad downtown.  I remember that I had to go out and specially purchase everything I needed - butter, peanut butter, cookie sheets, etc.  The man had the bare essentials and that was it.  He did have one cookie sheet, but it was questionable looking.  He had been talking about these and I remarked "are you kidding, those are so easy to make!" and then he asked me if I could make them for him.  I did, and then never made them again.

What a jerk.

See, it turns out that chocolate + peanut butter is Joe's favorite combination.  It also turns out that Hershey Kisses are my kryptonite.  You'd think that having to unwrap them in order to eat them would slow me down, but I think I see it as more of a challenge than anything else.  The tricky part with these cookies is that you have to unwrap the chocolates first, since you need to be able to press them into the cookies right away.  See the problem?

We were having some friends over and I hadn't made them in awhile (about 8 years, if you were wondering), so I decided it was about time to resurrect these babies.  Also... I really wanted some Hershey Kisses.

My self control paid off, since I had about a dozen chocolates left over that I could eat without feeling guilty (or giving myself a tummy ache) and everybody loved the cookies.  Also, Joe might have made a funny little shriek/squeal noise when he saw them cooling on the counter.


Peanut Butter Blossoms

48 Hershey Kisses, unwrapped
1/2 c. shortening
3/4 c. creamy peanut butter
1/3 c. granulated sugar
1/3 c. packed brown sugar
1 egg
2 Tbsp milk
1 tsp vanilla extract
1 1/2 c. flour
1 tsp baking soda
1/2 tsp salt

1/3 c. granulated sugar, for rolling

Preheat oven to 375°F.  Lightly grease cookie sheets and set aside.  Place the additional sugar on a small plate or in a bowl and set aside.

In a large bowl, beat shortening and peanut butter until well blended.  Add sugars and beat until fluffy.  Add egg, milk and vanilla; stir until incorporated.  Combine baking soda and flour and gradually beat into peanut butter mixture.

Shape dough into 1-inch balls and roll in sugar.  Place on baking sheet.  Bake 8-10 minutes, until lightly browned (I baked mine for 8 minutes).  Remove from oven and immediately press a chocolate into the center of each cookie.  The cookies will crack around the edges.  Let cool for a couple of minutes on the cookie sheet, then remove to a wire rack to cool completely.

Thursday, December 19, 2013

Chocolate Cola Cupcakes

I don't even know how I stumbled on an idea like this, but in a nutshell, it's chocolate cake and chocolate frosting made with Coca Cola.

Now, if you know anything about me, you know that those are two of my favorite things.  I had never heard of it before so I started researching, and Google tells me that this kind of cola cake is pretty much a southern thing.  Of course, it doesn't tell me and I have no idea.  Maybe it has something to do with southerners needing to figure out a way to make their cakes still taste delicious in spite of the humidity?

I'm not sure, and frankly, it doesn't even matter.  Wherever you're living, you need to make these right now because you're going to LOVE them.  These cupcakes are moist and fluffy!  The hint of cinnamon adds a little depth to the chocolate, and the frosting?  HAVE MERCY.  There's a container of it in the refrigerator and it's taking all of my self control not to go at it with a spoon.

I wasn't really sure how much soda I needed for this, so I ended up buying a 6 pack of cans because I'll drink it anyway (soda is one of my very few vices, lol).  Turns out, I only needed one regular sized can (not those little miniature ones).  I would've found that information helpful from the start, so I'm passing it along to you so you can plan accordingly :)  My Coke was room temperature when I used it, but I don't think it really makes too much of a difference.  You can certainly use the bottle if that's you have/prefer, but I would suggest making sure it's a brand new one and not one that's been around for a few days, since the carbonation seems like it's an important part of this recipe.

You can tell this is one of my favorite recipes because I don't have a lot to say about it (too busy eating cupcakes).  If you make these, please let me know what you think!  My brother may have eaten 6 in a row :P

I was pretty generous with my frosting, but you'll most likely end up with some left over.  If you're like me, that means you quickly stash it in the fridge and try to forget about it before you attack it with a spoon.  When your willpower inevitably cracks and weakens, as mine did, you'll want to let the frosting warm up a little bit before you attack it with a spoon.  The soda makes it a little sweet to eat straight, so I ended up scooping mine with pretzels.  Sweet, salty AND crunchy?  Chocolatey heaven!

Chocolate Cola Cupcakes

For the cupcakes:
2 c. granulated sugar
2 c. flour
1 c. (2 sticks) butter
3 Tbsp  coca powder
1 c. Coca Cola
1 tsp. baking soda
1/2 tsp. cinnamon
2 eggs
1/2 c. buttermilk
1 tsp. vanilla


For the frosting:
2 sticks butter, room temperature
3 c. powdered sugar
6 Tbsp cocoa powder
6 Tbsp Coca Cola
1 tsp. vanilla

Method:
Line cupcake tins with cupcake papers and preheat oven to 350°F.

In a medium sized saucepan, combine butter and Coca Cola and bring to a boil.

In a large bowl, combine flour and sugar.  Slowly and carefully add in the Coke mixture and stir to combine.  Mix in buttermilk, baking soda and cinnamon.  Add cocoa powder and mix well.  Stir in vanilla and add eggs, one at a time.  Whip ingredients until well blended.  Batter will be loose.


Fill cupcake papers about 2/3 full.  Bake for 20 minutes, until tops spring back when lightly pressed and a toothpick inserted in the middle comes out clean.  Yields about 24 cupcakes.

While cupcakes are cooling, combine butter and vanilla in the bowl of a stand mixer and beat until smooth.

Slowly add in the sugar and cocoa, adding the soda as needed when the frosting gets too thick.  Continue adding soda until desired consistency is reached.

Beat 3-5 minutes until frosting is fluffy.

Wednesday, December 4, 2013

No Bake Cookie Dough Bites

I LOVE cookies.  Frankly, when it comes to cookies, I'm probably the least picky person on the planet - Oreos, store brand sandwich cookies, fig newtons, peanut butter, oatmeal, those yummy italian cookies that I only get at Christmas... if it's a cookie, I want it.  By far, though, my favorite cookie is just regular ol' chocolate chip.

As a kid, I would stand in or near the kitchen, anxiously awaiting mom to say that the cookies were cooled enough for me to take one.  Let's be honest - sometimes I didn't even wait.  I love it when the cookies are hot and fresh, right out of the oven and the chocolate is so gooey it drips down your chin when you take a bite.  Sure, sometimes they were REALLY freakin' hot and I burned myself, but it was all worth it.

Once I started making cookies myself, my favorite part was being able to lick the bowl/spoon without having to share with anybody (the perils of having younger siblings).  The only problem is that I have been known to give myself a tummy ache a time or two from eating too much cookie dough.  Or brownie batter.  Or cake batter.  And watermelon. Mmmmmm.

Where was I?

Oh yeah.  Chocolate chip cookies.  So, my friend Natascha has a son and he just turned two.  I told her I was going to make something, but then I had no idea what to make.  Last year, I made cupcakes, but so did everyone else.  I knew there were going to be a good amount of kids at the party, so I wanted to make something that kids and parents enjoyed but that was super easy for the kids to eat -  you know, so they could sneak a couple when mommy and daddy weren't looking.

Cookie dough bites seemed like a great idea.  Except for the whole "raw eggs make you sick" thing.  I knew I could make a bunch of cookies and then crush them up with some cream cheese to make truffles, but I wanted these to REALLY be cookie dough, just without the eggs.  Alas, I knew I needed something to add some moisture to the dough, but I didn't really know what I could use.  I knew that applesauce was a good egg substitute, but I didn't have any in the house and wasn't about to go buy some for the small amount that I needed.

I did a ton of googling and it seemed like whatever I was going to do, water was not the right answer.  I found some recipes online that used almond/soy/non-dairy milk for similar recipes, and they all had pretty good reviews, so I decided that I could probably use regular, whole dairy milk in my recipe and get similar results.

I tried it and, what do you know - it worked!  People, these are freakin' delicious.  It's like the best part of the cookie without ever having to turn the oven on!  As soon as the kids (and adults) realized that these little balls of chocolate had cookie dough inside, it was all over. 

After figuring out the dough, making these was super easy.  I did end up shelling out $8 at Target for a cookie scoop, but that's because whenever I make things like this, I have some that are huge and some that are little and some that are in between.  When I make regular, baked cookies I don't have a problem getting everything to be the same size, but I thought this project would be a lot easier if I could get the sizing to be consistent.  I still can't believe I paid that much for it, but it definitely helped! It felt pretty efficient, too, since I was able to scoop all of them out at once and then roll them all, instead of having to scoop and roll at the same time.  My cookie scoop said it makes 2" diameter cookies.  That seems like it might be fairly accurate to what I was able to make, and I got about 3 dozen - obviously, you'll get more or less depending on what size you make yours.

These don't take very long, either.  Most of the time is waiting for the dough to chill and then waiting for the chocolate set.  These were definitely a huge hit at the birthday party, but I think they'd go over well at your holiday party or at a football party.  Actually, I think I'm gonna put these on my list for the Superbowl!

What are you waiting for?  Go make some!

PS: as it turns out, today is national cookie day.  What's your favorite kind of cookie?

No Bake Cookie Dough Bites
1 c. (2 sticks) butter, room temperature
3/4 c. granulated sugar
3/4 c. brown sugar
1 tsp. vanilla extract
2 Tbsp milk
2 1/4 c. flour
1 c. mini chocolate chips

14 oz. chocolate for dipping

Beat butter and sugars until light and fluffy.  Add milk and vanilla.  Mix in flour and stir by hand until incorporated.  Fold in chocolate chips.

Cover and chill dough in refrigerator for about 1 hour.

Form dough into balls about 1-2" diameter and arrange on a baking sheet.  Chill for about an hour.

Melt chocolate according to package directions.  Working with a few balls at a time, dip the cookie dough balls into the chocolate, letting excess drip off.  Place on wax or parchment paper lined cookie sheets.  Let chill until chocolate is set.  Trim off excess chocolate with a sharp paring knife.

Store in an airtight container for up to one week (although good luck getting them to last that long).

Thursday, October 31, 2013

Boo! Chocolate Cupcakes


Boo!

We had a potluck lunch today at work and since I volunteered to bring dessert (shocking, right?), I wanted to make something that everyone would enjoy but that was also Halloween-y.  Last year, I made dirt pudding, but this year, I wanted to really make something special.

My cake decorating skills are still pretty limited, but I figured I could easily pipe some lines of frosting on a cupcake to look like a mummy.  M&Ms for eyes add the perfect touch.

I went into this cupcake making adventure completely blind.  While I've had good results from the recipes in my KitchenAid book, I haven't tried them all.  The frosting recipe was something I found online awhile ago and then tucked away for a time when I could figure out what to put with it.  I thought chocolate cake and marshmallow frosting would taste something like a whoopie pie.  Since I was making them last night while waiting for game 7 of the World Series to start (spoiler alert: my Red Sox won!), it seemed apropos and timely.

I've used the white cake recipe in the KitchenAid book before and it make about a dozen cupcakes, so I doubled this one, thinking I'd get about 24.  Obviously something crazy happened, because I got 36 regular sized cupcakes and 10 mini ones.  Ah well.. at least I had enough frosting!

As far as the frosting goes, I'm learning that patience is key.  When it says "whip butter until smooth and creamy", that means whip the butter until it's smooth like... well, like buttah!  Seriously, you want the butter to be super smooth and creamy.  And then you really want to thoroughly mix in the marshmallow fluff, until the contents of your bowl are white.  This was the fluffiest frosting I've ever made and it was the perfect piping consistency.  It made me wish I was better at decorating so I could have tried something better or more intricate than just crisscrossing lines.  I think as long as I'm patient with my regular buttercream frostings, I'll be able to get consistently fluffy results every time.

We live in an apartment building and there aren't many kids that live here, so we don't get any trick or treaters.  Instead, we're hanging in our PJs, eating mummy cupcakes and watching the Bengals-Dolphins game (hey, the Bengals are Halloween colors!).  How are you celebrating Halloween?

Chocolate Cupcakes with Marshmallow Frosting

Chocolate cake:
2 c. flour
1 c. sugar
1 tsp. baking powder
1/2 tsp. baking soda
1/2 c. shortening
1 c. milk
1 tsp. vanilla extract
2 eggs
2 oz. unsweetened chocolate, melted*
*I substituted 3 Tbsp. unsweetened cocoa powder + 1 Tbsp. vegetable oil for each ounce of melted chocolate

Preheat oven to 350°F.  Line a 12-cup muffin tin with cupcake papers or spray with non-stick spray.

In the bowl of a stand mixer, combine dry ingredients.  Add shortening, milk and vanilla.  Turn mixer on low and beat until combined - batter will be a little lumpy. Add eggs and chocolate; mix until combined.  Scrape down the sides of the bowl and beat on medium-high speed for about 1 minute, or until batter turns from a dark chocolate to a milk chocolate color.

Fill cupcake liners about 2/3 full.  (I got 16 regular sized cupcakes from the recipe above).  Bake for 18 minutes or until the tops spring back when lightly pressed and a toothpick inserted in the center comes out clean.

Let cool in the pans for a couple of minutes, then transfer to a wire rack to cool completely.

Marshmallow Frosting:

1 cup (2 sticks butter), room temperature
1 7.5 oz. jar marshmallow fluff
2 c. confectioner's sugar
2-4 Tbsp milk

Using a mixer, cream butter until smooth and creamy.  Add in marshmallow fluff and beat until fully incorporated.  Slowly add in the sugar, making sure each additional is fully combined before adding more.  Add in the milk, 1 tablespoon at a time.  Beat until frosting is soft and fluffy, adding more milk or sugar to reach desired consistency.

To make the mummy cupcakes, put the frosting into a zip top bag and snip off the end.  Pipe crisscrossing lines across the cupcake.  Use m&ms for eyes, "m" side down.

Friday, September 6, 2013

Flourless Chocolate Cupcakes

I feel silly posting these cupcakes on a baking blog - especially MY baking blog - because these aren't even baked.  They're microwaved.

I know.  I was skeptical, too.  But they seemed so easy that I figured there was no possible way these could go wrong.  That, or they would be terrible and inedible, but then I figured I could just blame that on the microwave, too.  On a somewhat serious note, I wanted to try this because it's pretty similar to the way Hungry Girl and others suggest you make a single serving of something - cake, cupcake, brownie, etc - but without having an open and partially eaten package of mix in the cabinet.

The other thing I like about these is that if you don't tell anybody how you made them or that they only have 4 ingredients, NOBODY WILL KNOW!  They're still as moist and fluffy and delicious as if you had just baked them that morning.  Only you didn't bake them.  You microwaved them.  For a whole minute.

Actually, I also like these because they're gluten free.  And low calorie.  I don't have the exact calorie counts, but there's hardly anything in them so it can't be that high.  Technically speaking, I guess these would also be kosher for Passover (I know, I know - too soon!), but it would depend on whether or not you believed that using baking soda to make these babies rise violates the "spirit" of chametz, but that's not something I'm going to get into today.

They don't take a long time to make, so it's pretty easy to make a whole bunch of them for a party (which I did) in not a very long time at all - especially if you're low on ingredients.  Speaking of which, these are ingredients that most of us probably always have in our cabinets and pantries, so it's nice to know that yes, you can quickly take care of that cupcake craving without having to make 24 tempting treats or without having to open an entire box of mix only to use a couple of tablespoon's worth.  I topped mine with some leftover cherry frosting I had in the fridge (also gluten free), but you can also eat them naked or top with your favorite desert.  I'm thinking ice cream would be delicious.

Okay, that's enough of my rambling on about these babies.  Go make them.  When you're done, I want to know: what's your favorite few-ingredient recipe?

Flourless Chocolate Cupcakes
To print this recipe, click here

Ingredients
1 egg
2 Tbsp unsweetened cocoa powder
1 Tbsp sugar
1/4 tsp baking soda

In a small bowl, mix together all ingredients.

Lightly spray two coffee mugs with non-stick spray.  Evenly divide the batter between them. (about 2 Tbsp each)

Microwave both mugs for 1 minute.  Cupcake is finished when the top springs back when lightly pressed and a toothpick inserted in the middle comes out clean (I have a 1000 watt microwave and only needed 1 minute).

Run a knife around the outside of the cupcakes.  Tip the mugs over and let cool completely.  Top with your favorite frosting or eat them naked.  Enjoy!


Sunday, June 9, 2013

Cake Pops: First Attempt

In honor of Josh's high school graduation, I was going to blog about his favorite recipe.  But, I promised him we could make it together this summer, so I will save the post for a later date and instead share about my first attempt at cake pops.

I like to think of this as a follow up to my post about Samantha's rainbow cupcakes.  See, I made some extra in case I had some casualties.  I had a couple, so it was a good thing I did.  I somehow ended up with a full extra dozen cupcakes.  I wanted to eat them, but I also wanted to do something different with them.  So, I decided I would try to make cake pops.
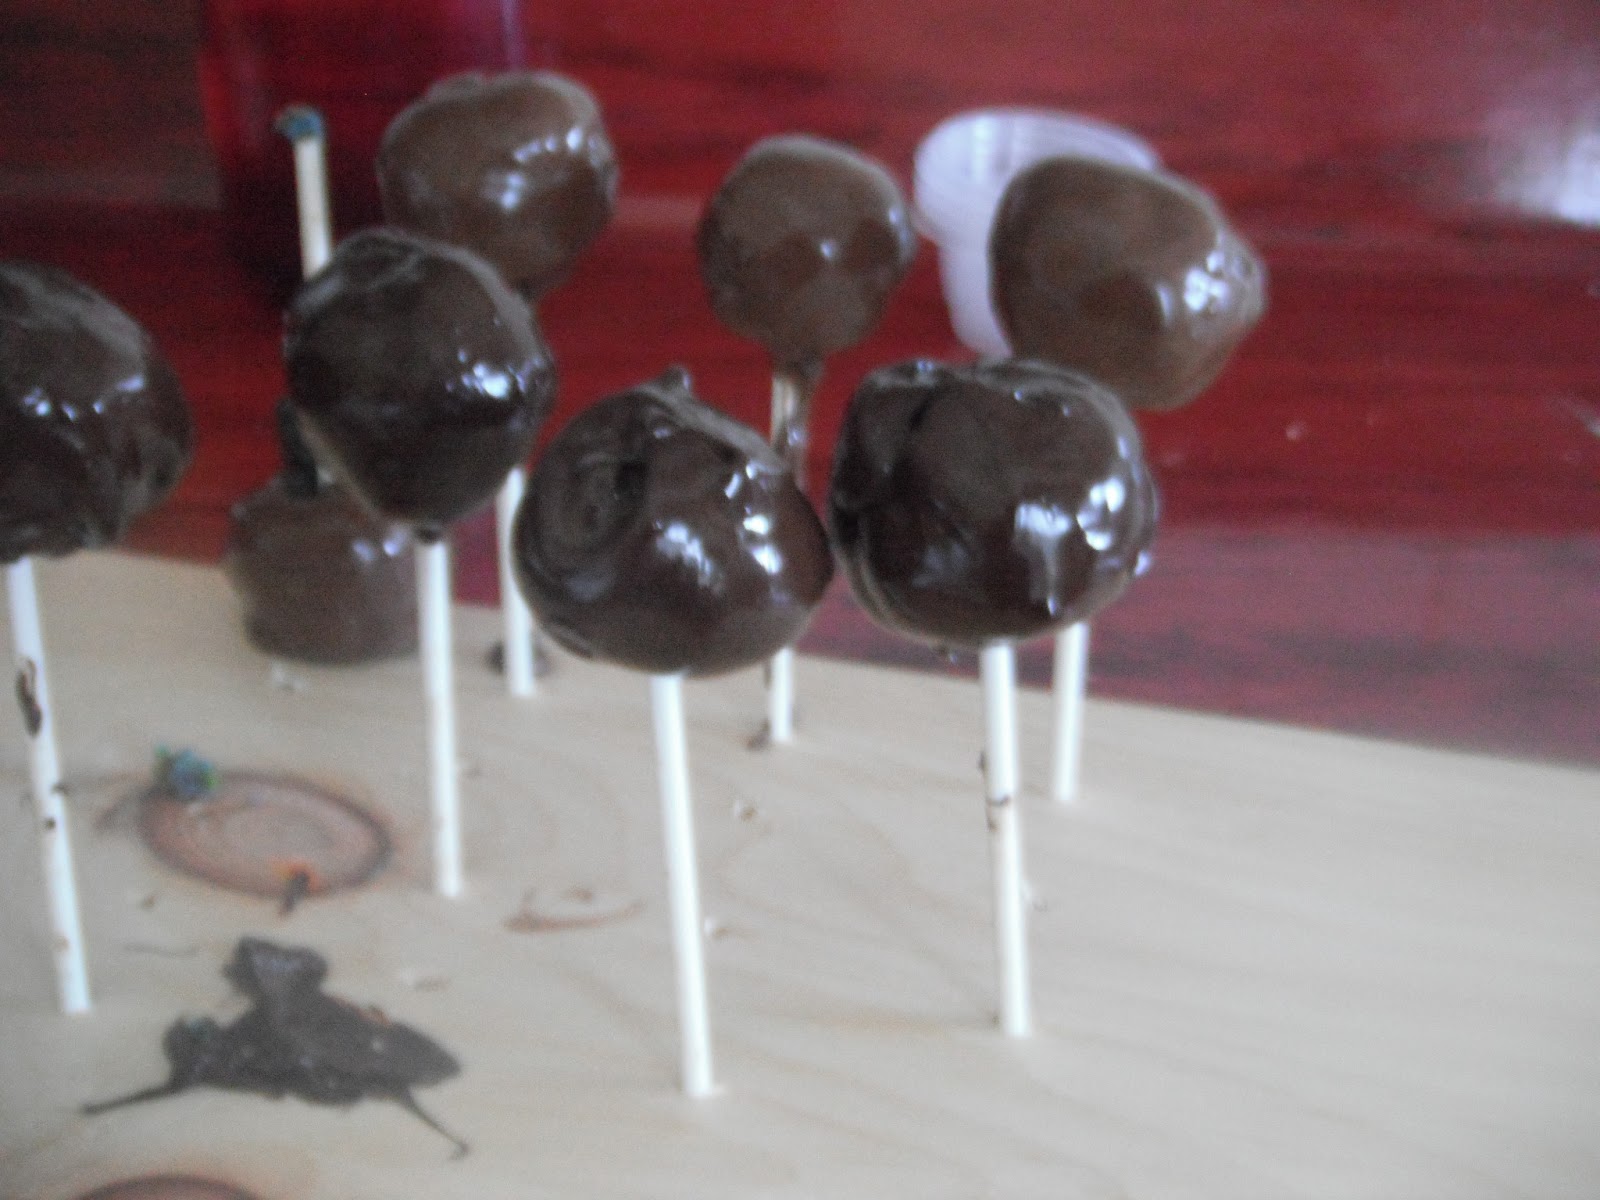
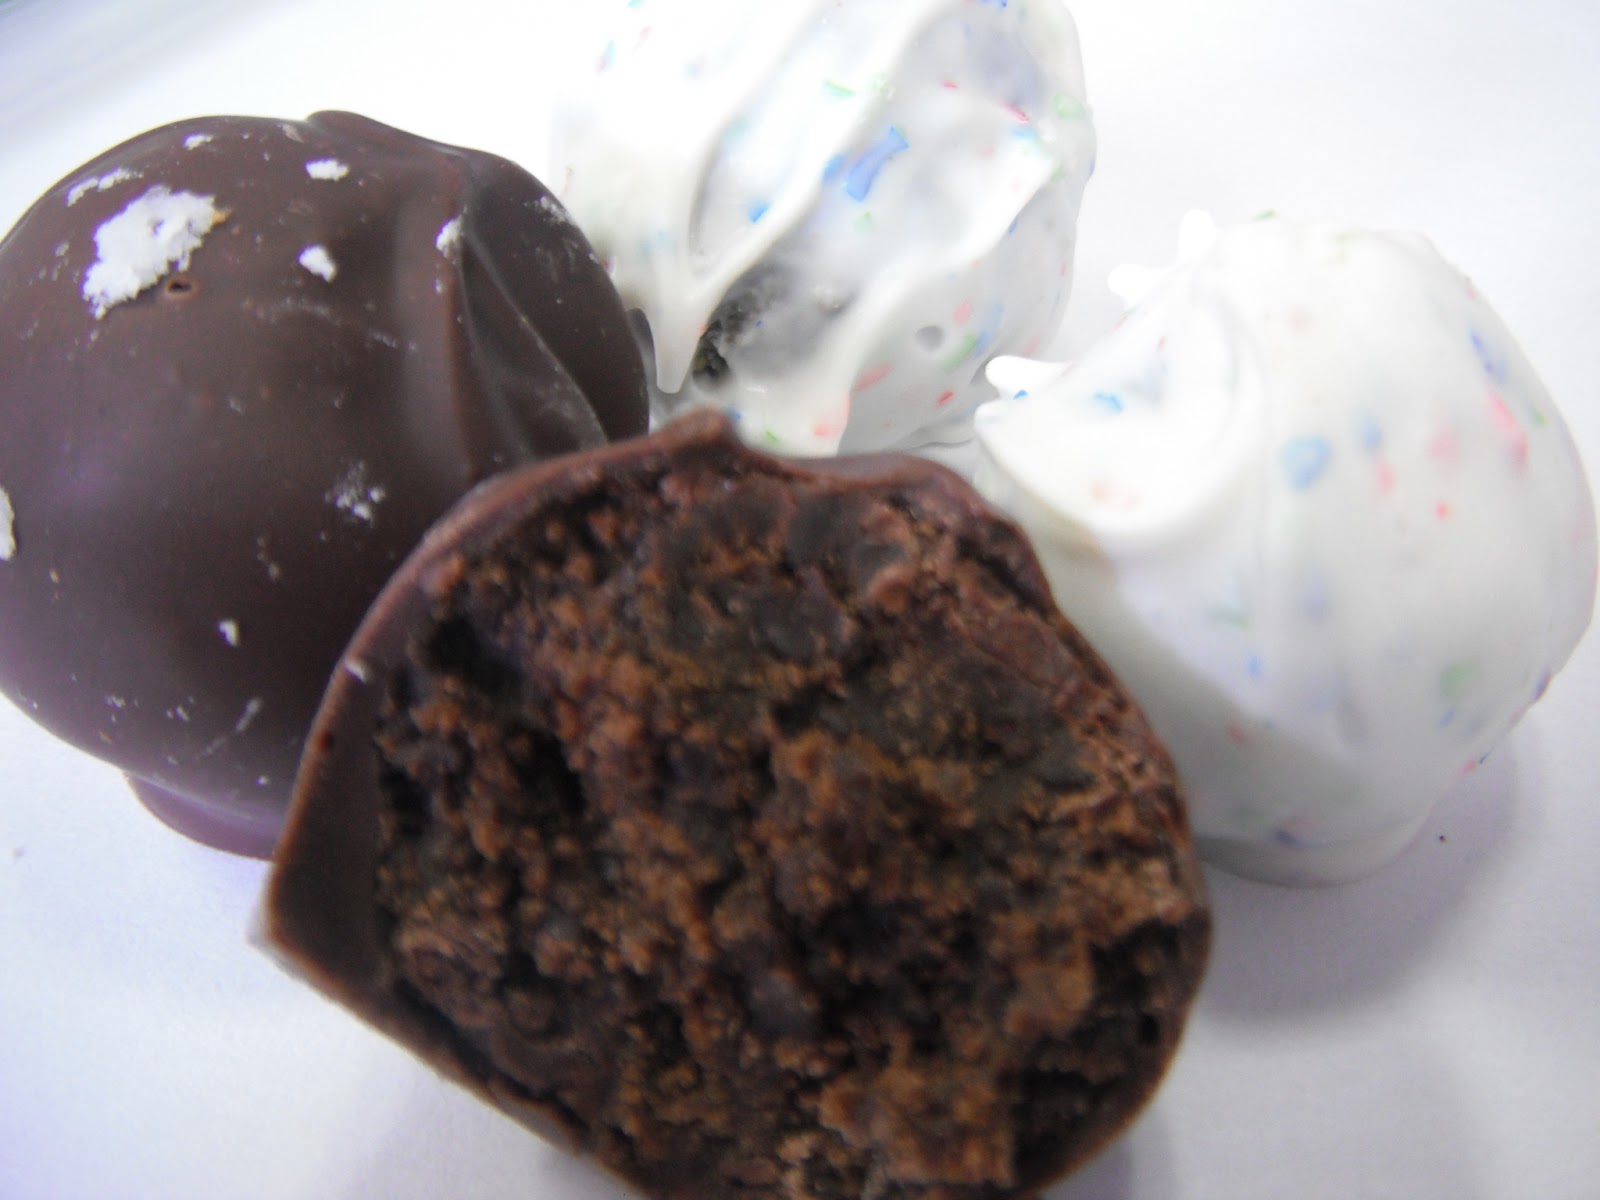
 "Try" is the key word, here.  I've already looked online and figured out some things I can try to make them come out better next time.  I used dipping chocolate and candy coating for these, and I had a much better and easier time with the chocolate.  Candy coating, apparently, is harder to use than you would think, which explains why I mostly ended up with (lumpy) cake balls instead of cake pops.
Here's the thing:  they look pretty ugly - or, at least not as awesome as all of the other ones on the internet - but holy crap they are delicious!
Josh gave me a box of red velvet cake mix awhile ago, and I think I am going to try to make those into cake pops.  I'm hoping that the idea in my head translates well in real life, but I think that if I combine that with what I read online and what I figured out the hard way, I'll be in good shape.  To be honest, I'm really excited about trying them again so that I can have something that looks as good as it tastes.
If you're thinking about making cake pops (or cake balls), I found this link to be pretty helpful: Common Cake Pop Issues & Tutorial.  Of course, you'll probably want to check it out before you start making them.

What's the last recipe you made that ended up being harder/more complicated than you expected?

Wednesday, May 22, 2013

S'mores, please!

I was originally going to blog about something else, but with Memorial Day right around the corner, this seemed pretty apropos.

I found the original recipe in a Food Network magazine that my future SIL gave to me.  Someone keeps subscribing her to magazines that she doesn't want and doesn't read.  Which is a huge score for me, because I love magazines - ESPECIALLY when I don't have to pay for them!

I had some people over my house this weekend for a jewelry party, so I converted this into a gluten free recipe so that everybody could eat it. I only told a few people that that they were GF, and the people who didn't know really couldn't tell - everyone kept talking about how delicious they were.  Josh came over on Monday and he took the rest home, bound and determined not to share any with mom (sorry).  I'm pretty sure I'm going to make this again for the family Memorial Day cookout.  I've mentioned in previous posts about wanting to make more GF things, and while I only have a few under my belt, I can already tell that this will be one of my favorites.  See, I'm of the mindset that having special dietary requirements or restrictions doesn't mean that food has to be gross or taste less delicious than the regular version.  With this recipe, you can't tell the difference, and that's precisely why I love it.

What's your favorite recipe for special diets?

Baked S'mores Bars
To print this recipe, click here
 photo Smores-bars_zps10bc9fb7.jpg
Ingredients
1 stick butter, room temperature
1/4 cup sugar
1/4 tsp. brown sugar
1 tsp. vanilla extract
1/2 c. gluten-free all purpose flour
1/2 cup gluten-free graham cracker crumbs (about 8 graham crackers)
16 gluten-free graham crackers, whole
1 tsp. baking powder
1/2 tsp. cinnamon
2-3 oz. dark chocolate bars
gluten-free marshmallow fluff or marshmallows
 
Preheat oven to 350°F.  Grease an 8" square pan and set aside.

In the bowl of a stand mixer or with an electric hand mixer, beat the butter, sugars and vanilla together until light and fluffy.

In a small bowl, combine flour, graham cracker crumbs, baking powder and cinnamon.

Stir graham cracker mixture into butter until combined and a thick batter forms.

Spread the batter on the bottom of your prepared pan.

Evenly lay the two chocolate bars across the batter.

Spread the marshmallow fluff (or sprinkle the marshmallows) over the chocolate and evenly top with the whole graham crackers.

Bake for about 25 minutes, until fluff has lightly browned and top graham crackers have set.

Cool completely and slice.

Yields approx. 16 bars.

 photo Smores-bars-2_zps103a8b36.jpg

Sunday, April 21, 2013

Gluten Free Espresso Hazelnut Toffee Brownies

Joe's mom and sister both have celiac disease, which means that their bodies can't process any gluten (wheat, barley, rye, oats, spelt, etc.).  Actually, there's much more that goes into it, but I'm not even going to pretend to be an expert.  Instead, here's the Wikipedia link: Celiac Disease

Joe's family's get togethers are always potluck style, with everyone bringing a different dish so that the host doesn't have to try and cook for 30+ people all alone.  This is awesome, except that his mom and sister's special dietary requirements mean that they're limited to what they can eat and that baking, specifically, is very difficult.  I've been trying to add more gluten free things to repertoire, but the fact of the matter is that it's a lot more expensive and it's difficult for me to justify spending all the extra money on "safe" ingredients when they will likely go bad before I'm able to use them up and get my money's worth.  I've tried some of the packaged mixes (Betty Crocker makes brownies and cakes and Bob's has a ton of different things, from pancake mix to chocolate chip cookies) and while they're all good, they're not great.  Seems to me that the best way to make something gluten free is to have all of the right flavors with none of the dangerous stuff.

I recently learned that there are ways to make most everything gluten free without buying fancy or special ingredients, simply by changing the flours that you use.  Since wheat is off-limits, so are wheat byproducts, like regular white flour.  However, almost everything can be ground into flour - including gluten free things, like almonds and rice and potatoes.  It's not a one-to-one exchange, but knowing that I can make little tweaks and adjustments to current recipes (provided that everything else in the recipe is also gluten free) is PRICELESS.  The chart below is certainly not all inclusive for all of the wheat flour substitutes, but if you're either gluten free yourself or cooking for someone who is, then this should be helpful!

I've done some research on substituting almond flour for regular wheat flour, and it looks like it's usually a one-to-one exchange... as long as you have actual almond flour, not almond meal.  The difference is that almond flour will be really finely ground, while almond meal will be coarser and still have the skin.  Since there's no gluten, both almond flour and almond meal will react differently with the wet ingredients.  You'll most likely need a little more, so start with a one to one swap and go from there. (Almond Flour Baking Primer and Baking with Almond Flour Meal)

This should go without saying, but if you're allergic or sensitive to almonds, DON'T USE ALMOND FLOUR!

Now... on to the recipe...

Joe's sister, Melissa, has been texting me all weekend about how awesome these brownies are.  I'll be honest: they are really delicious.

They're moist and chewy like any good brownie should be.  They're chocolatey, which is always important.  Truthfully, that was the part that had me the most concerned: I've never made chocolate brownies or cake without using cocoa powder, so relying on melted chocolate made me a little worried.  Going to the grocery store worried me, too, since I was having a really difficult time finding two GF candy bars that would compliment each other enough to be in the same recipe.  I've had Endangered Species before (Joe sells them at work) and truthfully, I've never had a bad bar.  Sure, I like some more than others, but they're all really, really good.  They're also gluten free.  They have a ton of different varieties, too, and a portion of the profits goes to support habitat preservation.  Each bar features a different endangered animal on the front label, with the inside label telling you more about the plight of the animal.
The rhino and tiger are the stars of these brownies

The almond flour adds a nutty flavor to the brownies, which compliments the chocolate really well.  Oh, and Melissa can eat them without dying, which I guess is a good thing, too. =)

The only thing that makes me sad about these is that Joe can't eat them since he's allergic to almonds.  I'm really excited that I finally have something I can bring to family functions, though, so I'm going to keep playing around and see what other flavor combinations I can come up with.

What are some of your favorite gluten free recipes?

Gluten Free Espresso Hazelnut Toffee Brownies
To print this recipe, click here


Ingredients
Endangered Species 72% Dark Chocolate with Espresso bar (tiger), broken into squares
1/2 cup ghee (clarified butter)
1/2 cup honey
2 eggs
3/4 cup almond flour
1 teaspoon pure vanilla extract
1/2 teaspoon sea salt
Endangered Species 72% Dark Chocolate with Hazelnut Toffee (rhino), chopped into chunks

Preheat oven to 325°F and grease a mini muffin pan; set aside
In a microwave safe dish, melt ghee and the Endangered Species tiger bar
Stir in honey and eggs
Add almond flour, vanilla and sea salt
Fold in the chocolate chunks
Fill each muffin tin with 1 tablespoon of batter
Bake for 15-20 minutes or until a toothpick inserted in the center comes out clean

Let brownies cool.  Run a knife around the outside edge of each mini muffin and lift each one out, carefully.  It may help to use a spoon here so you can get underneath the brownies.  Store in an airtight container and enjoy.


Wednesday, April 17, 2013

No-Bake Thin Mint Truffles

Remember how back in January I talked about Joe buying a ton of Thin Mint Girl Scout cookies?  We still have some, and he was kind enough to "allow" me to have a half a box with which I could do whatever I pleased.  I wanted to eat them, but I had a ton of recipe ideas involving Thin Mints/other cookies, and thought it would be a good idea to try one of them out.

These no-bake truffles are amazing.  They're super easy to make, take barely any time at all AND only use three ingredients! Obviously, I made mine with Thin Mints, but if you don't have them, you can easily substitute them with Keebler Grasshoppers (if you want minty ones), but I'm also thinking about trying them with Oreos and chocolate chip cookies.

My recipe made about 20, but since I was playing around, I didn't really want to make too many and then have them not be so tasty.  If you need to make more, you can easily double, triple, etc. the recipe.  I originally tried combining everything with a wooden spoon, but you'll want to skip that and just use a fork.  Trust me, it will make your life a million times better.

Also, the amount of the melting chocolate is a guess.  You know those little baker's dipping chocolate things that come in the little microwave container? I had about 1/4 of one of those left in the fridge from something else, plus I had bought a 10 oz. bag of Candy Melts at Michaels that I used about half of.  If you have leftover chocolate or candy coating that's already been melted, you can stick it in the fridge in an airtight container for later use.  Most of the packaging recommends storing it for up to a week or two, but I've used it older than that and never had any issues. 

What's the last few-ingredient recipe you made that came out better than you expected?

No-Bake Thin Mint Truffles
To print this recipe, click here


Ingredients
1 roll (approx. 16 cookies) Thin Mints or Keebler Grasshoppers
2 Tbsp. brick cream cheese, softened
7 oz. dipping chocolate and/or candy coating

Line a baking sheet with wax or parchment paper and set aside.

Put the cookies into a ziplock bag and squeeze the air out.  Seal the bag.  Using a rolling pin, crush the cookies into fine crumbs (you don't want any big chunks).

In a bowl, combine the cookie crumbs and the cream cheese.  Using a fork, cut the cream cheese into the crumbs until the cream cheese disappears (no white spots!) and a thick dough forms.

Roll the dough into one-inch balls and place on the prepared baking sheet.  To keep mine uniform in size, I measure out a teaspoon-full of dough for each one.  Place the baking sheet in the fridge to set, about 30 minutes.

Melt chocolate or candy coating according to package directions.  Drop each truffle into the chocolate/candy coating, coating completely.  Use a fork to lift truffles out of the chocolate and drain the excess.  Place back onto prepared baking sheet.  Once all truffles are covered, place back into the fridge to set, about one hour.  Store in an airtight container in the refrigerator.