Friday, March 29, 2013

Apple Matzah Kugel

I promised you another Passover recipe, and while the brownies were good (have you tried them yet?), this one is my absolute favorite.  Before I get into it, though, I want to make something very clear:  this IS a gebrochts recipe, so if you generally abstain from eating anything where the matzah comes into contact with the water, then unfortunately, this is not the recipe for you.

If gebrochts isn't an issue for you and you want some more information, I'll give you a crash course:

Many Asheknazic and Chasidic Jews avoid putting matzah and its derivatives into water or any other liquid.  If a clump of flour is not kneaded into the dough, it can still be susceptible to leavening.  If this flour came into contact with water, it would become chametz, which is not allowed on Passover.  For those of us living in the Diaspora (outside of Israel), Passover is 8 days, not 7.  This 8th day is more of a celebratory day, connected with the future redemption and a time when no evil will befall us.  As such, those who are normally only non-gebrochts during Passover make it a point to eat gebrochts on this last day of Passover, without worrying that it will turn into chametz.

Now that I have made my Jewish friends and Rabbis proud for remembering all of this information, let me tell you a little bit about this recipe.

First, we have to go into the way-back machine to about 12 years ago, when I first learned how to make this.  You see, at the time, my aunt was really sick with ALS and was confined to a wheelchair, but goddamnit, she was going to cook Passover dinner one way or the other.  The way to do it was to get my cousin, Jillian, and I to do the handiwork while she did the directing and instructing.  Truthfully, I first learned how to cook and bake in pretty much this exact same way: Auntie sitting across the table from me, directing me and walking me through each recipe, step by step.  When I was 14, I learned how to make a full Passover and Thanksgiving dinner.  Pretty much the only thing we weren't responsible for was the turkey, and that's because my uncle put it in the oven in the morning before he went to work.
Blast from the past! L-R; Me, mom, my cousin Josh, my auntie, my cousin Jill, circa 1992

The main thing that I remember about first making this recipe is my aunt laughing at me, hysterically.  She used to have to get extra apples (and potatoes) when we were cooking, because for some unknown reason, I was notorious for dropping them into the trash can.  You'll be happy to know that I made it this time around, I only had ONE casualty... and that's because the apple was rotten, not because I dropped it.

So.  My aunt passed away when I was 16, and I've had this recipe since the first time I made it.  I had it at my mom's house, but then I couldn't remember where I tucked it away.  Then, I had my cousin text it to me, but never actually wrote it out.  Then I moved and if I did indeed write it out, it had gotten lost in the shuffle.  When Joe and I moved in here almost 2 years ago, the first thing I had my cousin do when she came over was write this recipe down for me.  I remembered that this was really easy to make and that even though it's a Passover recipe, everyone enjoyed it and gobbled it up in like 2 seconds flat.  I knew that this was the year and that I HAD to make it.

So, I did.  In fact, I made two of them.  And it's everything I remembered.  Basically, this is like a Passover version of an apple crisp/apple pie hybrid.  I used Granny Smith apples, so they still maintain some of their tartness and some of their crunch, but the sugar and spices makes it taste more like a fall dish, while the matzah adds something a little filling and actually works with the apples to create a nice contrast in texture and taste. 

Apple Matzah Kugel
To print this recipe, click here


Ingredients
 4 squares of matzah
4 apples, peeled, cored and sliced
1/2 tsp. cinnamon, plus more for dusting
1/4 tsp. nutmeg
1/2 c. sugar
4 Tbsp. butter, melted and cooled
2 eggs

Preheat oven to 350°F and grease a 9" x 13" pan.

Place sliced apples in a large bowl and set aside.  In another large bowl, break matzah into pieces.  Cover with water and let soak until soft but not soggy, about 5-8 minutes.  Drain.  Matzah will be wet - do not press dry!

Combine eggs, sugar, butter and spices.  Pour over apples.  Mix in matzah, stirring until everything is coated with the egg mixture.
Pour into prepared pan.  Sprinkle with extra cinnamon, if desired.  Bake for 30-35 minutes, until the top looks dry.

Let cool in pan.  Serve warm.  Store covered leftovers in the fridge.


Tuesday, March 26, 2013

Kosher for Passover Brownies

Passover started last night and ends next Tuesday night, April 2.  In an ongoing effort to learn how to cook foods that correspond with different Jewish holidays, I wanted to kick my Passover cooking up a notch. 

In other words, I'm sick of eating those bland, tasteless and heavy box mixes.  I don't expect them to taste like "regular" brownies or cake or whatever the box says is inside, but it would be nice if it tasted like SOMETHING.

I scoured the internet looking for Passover recipes and didn't see anything I liked.  Then, I found one that I sort of liked, only it called for vanilla extract, which isn't actually KFP since it's made with fermented alcohol.  So, I decided to fully embrace the holiday and went into the kitchen, mad-scientist style, and figured they would be delicious if God willed it.  Maybe I should back up a little, first.

On Passover, the only grain Jews are permitted to eat is matzah, an unleavened, cracker-type of bread.  We are forbidden to eat any of the 5 grains, called chametz: wheat, rye, barley, spelt and oats.  Depending on your Jewish heritage, forbidden foods also include: corn, peas, beans, peanuts (all legumes, actually) and rice.  This is because all of these are either grown near chametz, opening the door for contamination and confusion (the appearance of chametz), or can be ground up and used to make bread.  Leavening agents are also not allowed - yeast, baking powder/baking soda etc. 

There are other, selected foods that are prohibited, but that's basically a highlight reel.

So, when you take out all of those ingredients from food, you're left with something that's not really so tasty.

Unless you make these brownies.

Now, I'll be completely honest: they do NOT taste like regular brownies.  They certainly taste like Passover brownies, but they're also moist and chewy and chocolatey.  With a glass of milk, it's easy to overlook the fact that the only thing holding these together is some eggs and some crushed up matzah.  If you're going to make this recipe, definitely use the honey! Passover foods are notorious for being dry, so I needed to find a way to overcome the dryness.  Rather than adding more sugar, I opted for honey so that I could get the moisture and the sweetness in one fell swoop.  The melted chocolate also helped to round out the chocolate flavor.

I'll have another Passover recipe later in the week.  Until then, I hope your Sedarim were full joyful family and friends.  Chag Pesach Sameach!

Kosher for Passover Brownies
To print this recipe, click here


Ingredients
3 eggs
1 cup sugar
1/4 cup honey
2/3 cup unsweetened cocoa
1/4 cup melted chocolate
3/4 cup butter, melted and cooled
1/4 cup matzo meal

Preheat oven to 350°F and grease an 8" square pan.

Combine all ingredients and mix thoroughly.  Pour batter into prepared pan.  Bake for 30-35 minutes, until edges are browned and a toothpick inserted comes out clean.

Yields 16.

Thursday, March 21, 2013

Peanut Butter Buckeyes

Joe is a big fan of college sports.  Which is to say, college basketball and college football.  His favorite college football team is Ohio State Buckeyes.  What you probably don't know is that in real life, buckeyes are an inedible nut that have light a brown inner circle with a glossy, darker brown outer shell.  These buckeyes look pretty similar, but are made with chocolate and peanut butter.

The best part is that they're easy to make and, like most candy, you spend more time waiting for them to harden than anything else.  And by waiting, I mean saying "oh that one broke, I better try it and make sure they taste okay."  The recipe says to work with only a few peanut butter balls at a time, and that's definitely true.  I ended up having to put mine back in the freezer a few times because they got a little too soft and started to fall apart once I stabbed them with a toothpick. 

I don't want to call these a fail because they definitely weren't, but they were also not as popular as I had hoped.  When I made them, Joe had a toothache that made it hard for him to eat anything, but especially sweets.  My mom and brother both though they were good, but that they were too peanut butter-y/not chocolatey enough - which, in retrospect, are pretty much the same complaint.  Joe's boss, who gave me recipe and requested I make them, also was pretty "meh" about them.

Me? I LOVED these.  The recipe makes about 3 dozen and I might have eaten 2 dozen or so all by myself.  Whatevs.  They were DELICIOUS!  They taste like an overstuffed Reese's peanut butter cup, only about a million times better. 

Peanut Butter Buckeyes
To print this recipe, click here


Ingredients
2 cups confectioners sugar
3/4 cup smooth peanut butter
4 Tbsp butter, melted
1/2 tsp. vanilla extract
6 oz. dipping chocolate

Line a large cookie sheet with wax or parchment paper.

Combine sugar, peanut butter, butter and vanilla in a mixing bowl and beat well with a wooden spoon.  The dough will be thick and hard to stir, so you may need to use your hands. Roll the peanut butter mixture into 1" balls and place on the lined cookie sheet in a single layer.  Freeze until firm, about 20 minutes.

Melt chocolate according to package directions.

Working with about 6 peanut butter balls at a time, insert a toothpick into the center and dip about three-quarters of the ball into the chocolate.  You want to leave a circle of peanut butter visible in the middle.  Twirl off the excess chocolate and transfer to another lined cookie sheet, chocolate side down.  Repeat with remaining peanut butter balls, reheating chocolate as necessary. As chocolate starts to harden, smooth out the toothpick holes left in the peanut butter.

Freeze buckeyes until firm, about 1 hour.  Store in an airtight container in the fridge or freezer.

Yields about 36.


These are not edible
But these definitely are!

Sunday, March 17, 2013

Surprise! It's a cake!

On Monday morning, around 11:30am, my coworker announced that it was her birthday.  We all responded with the obligatory "happy birthday", and then started chiding her for not telling us earlier so that we could do something.  She told me that since I now knew it was her birthday, I had to make her something.

Twist my arm.

The only problem with making things for June is that she thinks everything is too sweet and always wants me to cut down the sugar - even when she doesn't know how much is in it.  I think it's because she's from China, so their sweets are totally different from ours.  I decided I wanted to make something delicious but that she wouldn't complain about.

I came in to the work the next day and gave her three choices.  The conversation went something like this:

Me: June, I have three choices for you for your birthday.
June: Really?
Me: Yes.  Lemon bars, chocolate cupcakes or surprise cake.
June: Surprise cake? What's that??
Me: Uhhh.. the surprise is that you don't know what it is.
(at this point, everyone else started chiming in with what they thought sounded good)
June: What does everyone else want?
Me: No, it's your birthday, you pick.
June: Okay. Surprise cake! Just don't make it too sweet, cut the sugar!

A couple of months ago, I had tried making rainbow cupcakes. I made two batches and while they both came out delicious, I was fairly disappointed with the results.  I looked up some pointers online and discovered I really just needed to be a little heavy-handed with the food coloring since the color fades as it bakes.  Easy enough.  I had already been thinking about the idea of rainbow marble cake for a few days, so this was really perfect timing.

I used the same white cake recipe as I did for my cupcakes, but I remembered having barely enough batter to make the cupcakes, so I decided to double the recipe.  I was a little nervous  - what if I end up with too much batter?  What if I overfill the pan and have a huge, disastrous mess to clean up? Turns out, this was a good call as doubling it ended up giving me a perfectly sized and shaped cake and I didn't have to clean up a mess.  Well, OK, I did have a mess to clean up, but that's because I used every small bowl in the house and almost every spoon, too.

I'm pretty terrible at math, but dividing the batter was way easier than I thought it would be, too.  I did double the recipe, but I made each one separately so that I could measure it and go from there.  The first one gave me about 3 1/2 cups of batter, so I knew that I'd have about 7 total cups of batter.  I was going to make 7 colors, but I wanted the colors to be vibrant and to be able to see that there were multiple colors.  So, I decided to keep it to 6 colors, with each one giving me a little bit more than 1 cup of batter for each color (I measured about 1 1/2 cups per smaller bowl, but I realize that 1.5 x 6 =/= 7, so these are obviously not exact measurements).

Once I dyed each bowl a different color, I just randomly dropped the batter by spoonful into the pan.  I was originally trying to do a checkerboard pattern to make sure each color was evenly represented, but that got very out of hand very quickly.  I just kept alternating colors, making sure to only do a couple of spoonfuls per color so that no single color was totally dominant


After all the batter was in the pan, I took a clean butter knife and swirled the batter using the flat edge.  I only swirled it a couple of times because I wanted it to look like rainbow marble cake, not rainbow poop cake.


The top was a little more brown than I would have preferred once I took it out of the oven, but I was pleasantly surprised once we cut into it at work!


For the frosting, I decided to go with a whipped cream + vanilla pudding combo.  I figured it would be sweet enough to compliment the cake, but not so sweet that June would complain about.  I was right on both counts.  Plus, I wasn't sure how much I needed, so I doubled the recipe that appears below.  The rest is no sitting in my fridge and tastes DELICIOUS on the end of a spoon =)

Easy White Cake
Recipe from Kitchenaid
To print this recipe, click here


Ingredients
2 cups all purpose flour
1 1/2 cups sugar
3 teaspoons baking powder
1/2 teaspoon salt
1/2 cup shortening
1 cup low fat milk
1 teaspoon vanilla
4 egg whites

Combine dry ingredients in mixer bowl. Add shortening, milk and vanilla. Attach bowl and flat beater to mixer. Turn to speed 2 and mix about 1 minute. Stop and scrape bowl. Add egg whites. Turn to Speed 6 and beat about 1 minute, or until smooth and fluffy.

Divide batter evenly into smaller bowls. Dye each smaller bowl of batter a different color, being sure to use a different spoon for each bowl so that the colors don't mix. Be a little heavy-handed with the food coloring, as the colors will fade a little as they bake.

Grease a 9" x 13" baking pan. Drop spoonfuls of batter into the pan. Alternate colors randomly, so that once completed, the batter looks like paint splatter abstract art. Using the flat edge of a clean butter knife, swirl the batter once or twice. Do not swirl the batter too much or the colors will end up muddled.

Bake at 350°F for 30 minutes, or until a toothpick inserted in the center comes out clean. Let cake cook completely in the pan on a wire rack. Once cooled, turn out of the pan and frost.

I couldn't resist peeking a couple of times while it was baking.


Yes, block letters, but still - first time writing on a cake!


Vanilla Pudding Frosting
 
Ingredients
8 oz. (1 cup) heavy cream
1/2 package instant vanilla pudding
1/2 cup cold milk

Combine milk and vanilla pudding in a small bowl. Let set for 10 minutes.
Meanwhile, whip the cream until it forms soft peaks. ( Add the set pudding and stir until thoroughly combined. Frost cake, storing any leftovers in the fridge.


Overall, this was probably the most fun I've ever had making someone's birthday cake.  This was a lot more time consuming than I had originally anticipated, but, completely worth it!  June brought some home for her youngest daughter.  The next day, June told me that her daughter LOVED the cake (she's 7 - I knew she would!) and that she thought it was a professional bakery cake, not something I really made.  I know kids don't really have a lot of "professional cake" reference points but still.  Totally made my day!

Monday, March 11, 2013

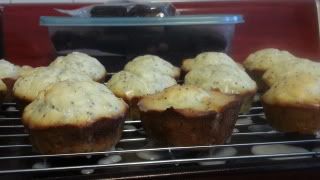
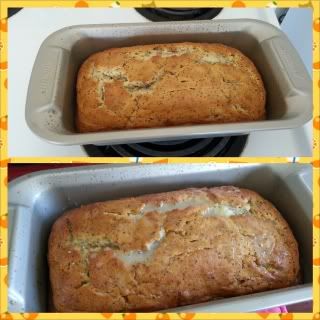
Lemon Poppy Muffins (and bread!)

A few weeks ago, I mentioned that I made hamentaschen for Purim.  Well, one of the side effects of making so many in so many different flavors was that I had some leftover poppy seed filling.  Normally, leftover filling isn't an issue, because it's easy enough to find something else to do with it.  Except that I only like poppy seeds in certain things.

It's snowed another 3 or 4 feet in the last couple of weeks, and I am SO over winter.  I got to thinking about recipes and flavors that scream "spring", and my thinking went something like this:  lemon.  lemon bars. good, but not what I'm looking for.  but soon.  I should write that down so I don't forget.  Keep thinking. Lemon... poppy seed.  Lemon poppy bagels.  Yes, but no.  Lemon poppy... muffins.  Yes, lemon poppy muffins! (side note: yes, I have 2 college degrees and sometimes have the attention span of spaghetti.  It happens.)

I made lemon poppy muffins a couple of weeks ago and told mom that I would make some for her.  I did, but then I ate them. Whoops.  I still had some leftover poppy filling and wanted to do something with it before it went bad. I didn't want to make muffins again because I figured the poor little guys would probably never make it my mom's house.  Joe and I were talking about dinner, and I asked if he wanted to me to break to go with it.  Then, I decided I'd make mom a lemon poppy bread.  (Also, I feel like I should tell you that I keep writing lemon poopy.  I don't know why.  These aren't poopy.) 

I mixed up all my ingredients, put the loaf in the oven, and called Josh.  I had to find out what time mom got out of work, because I wanted to make sure it would be there when she got home.  I told Josh what I was making, and he told me he didn't really like lemon but that it sounded delicious so he would try it.

It finally came out of the oven, cooled down enough for me to bring it to mom. When I got there, Josh wanted to try it with me to make sure I got a piece.  I cut a smallish end piece (my favorite!) and handed him a little bit in case he really didn't like it.  His response: "oh man this is sooo good, you should make one for yourself!"  I left him with strict instructions to save some for mom.

Basically, the muffins and the bread are the perfect spring time treat.  The lemon flavor is enough that you notice it, but not enough for you to make a sour face.  The poppy seeds add the perfect nuttiness and crunch to compliment the lemon.  And the lemon glaze is the icing on the cake (badum! I'll be here all week, folks!).  Really though, the lemon glaze makes it for me.  The combination of lemony tartness and sugary sweetness really work together to create a fresh and bright taste that makes me think of spring.  And after learning that we've gotten 106 inches of snow this winter, I'm DEFINITELY ready for anything that resembles springtime!

Lemon Poppy Muffins
To print this recipe, click here

 photo Lemon-poppy-muffins_zpsf8abf54a.jpg

Ingredients
For the muffins

2 sticks butter, room temperature
1 c. sugar
2 eggs
zest of 1 lemon
juice from 1/2 lemon
2 tsp. vanilla extract
1 c. full-fat sour cream
2 tsp. baking powder
2 Tbsp. poppy seeds
2 c. flour

For the glaze
1/2 c. confectioner's sugar
juice from 1/2 lemon

In the bowl of a stand mixer fit with the paddle attachment (you can definitely mix these by hand or with a hand mixer, too!), beat butter and sugar until smooth.  Add in the eggs, one at a time.

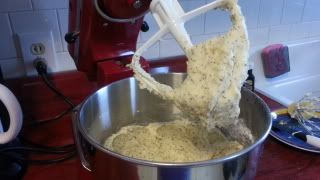
Beat in lemon zest, lemon juice, vanilla and sour cream.  Batter will be thin and lumpy.  Stir in flour, poppy seeds and baking soda.  Batter will be thick and easy to scoop.

 photo Lemon-poppy-batter_zps68173ef8.jpg

For muffins: Line a 12-count muffin tin with baking papers.  Fill each one until they're about 3/4 of the way full.  Bake at 375°F for 18-20 minutes, until the tops spring back when lightly pressed and a toothpick inserted in the center comes out clean.

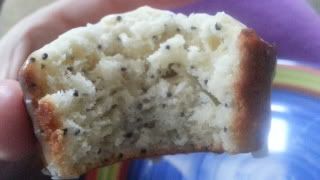
 photo Lemon-poppy-muffin-inside_zpsd9401582.jpg

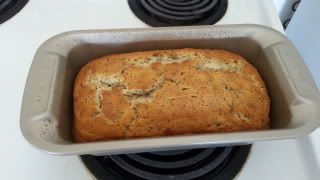
For bread: Grease a loaf pan and fill it with with batter, spreading to make sure it's even.  Bake at 325°F for approximately 1 hour, until the top is a light, golden brown and a toothpick inserted in the center comes out clean.

  photo Lemon-poppy-bread_zpsc97b0301.jpg

Let the muffins or bread cool for 5 minutes.  Combine glaze ingredients and drizzle over muffins or bread while still warm.  Let cool completely and enjoy!

  photo Lemon-poppy-bread-delicious_zps681c8c6c.jpg

What are some of your favorite spring or summer flavors?

Wednesday, March 6, 2013

Cinnamon Buns

Joe and I have a guilty pleasure: cinnamon buns.  Alas, over the last 8 years, cinnamon buns haven't quite reciprocated the love.  More times than not, our "let's have cinnamon buns!" turns into "well that was disappointing".  Usually, it's because they get burned, even when we follow the instructions on the Pillsbury tube TO.THE.LETTER.  Hell, we've even tried non-Pillsbury brand, thinking that somehow that was the problem.  We've only recently figured out how to make sure they come out delicious every time, but it requires a lot of babysitting.

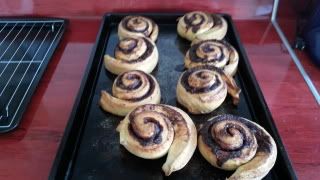
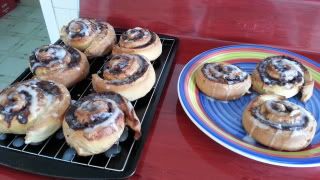
Sick of the incessant teasing by cinnamon buns, I decided I'd show them who's boss and make them myself.  For some reason, I had always envisioned that making homemade cinnamon buns would be really difficult and time consuming.  I was right in that it's time consuming, but like with other yeast bread recipes, most of the time isn't active and I spend it doing other things or waiting for the dough to rise so I can get on with the next steps.

Regarding the difficulty level, I was way off base.  I actually told Joe that I thought making them from scratch was easier than opening the tube.  I'm probably exaggerating a little bit, but these were really easy.  Especially since I was able to use my KitchenAid to make the dough (thanks again, mom!).  You could easily mix the dough without a mixer (I've made bread dough by hand), but you'll want to start kneading by hand around cup 3 or 4.  I like to add the flour one cup at a time, and when making dough by hand, I've found that it's easier to put each cup in its own individual bowl (I use a cereal bowl, usually), so that everything is already measured and easy for me to deal with when my hands are sticky and covered with dough.

When I was looking online for ingredients/ratios to make the recipe, I saw that a lot of recipes called for overnight proofing in the fridge before baking.  I didn't do this because I made mine first thing in the morning, but you could certainly do that with this recipe as well.  Just make sure you cover the pan with plastic wrap and let the cinnamon buns come to room temperature before you bake them.  Either way, your house/kitchen will smell amazing and everybody will love you!  If you have leftover like I did, store them in an airtight container.  Pop them in the microwave for about 30 seconds to warm them up and they'll get all gooey like when they were fresh.  Perfect breakfast with a cup of coffee!

Cinnamon Buns
To print this recipe, click here

 photo 20130304_070541_zps4201f879.jpg

For the dough:
1 package active dry yeast
1 c. warm milk
3 eggs
1/3 c. white sugar
4 Tbsp butter
1/4 tsp. salt
4-5 c. flour, plus more for kneading

For the filling:
1 c. brown sugar, packed
2 Tbsp cinnamon
4 Tbsp butter, melted

For the glaze:
1/2 c. confectioner's sugar
1-2 Tbsp. milk

In the bowl of a stand mixer fitted with the flat paddle attachment, add yeast to the warm milk and let sit for 5 minutes, until foamy.  Add butter, sugar, eggs and salt.  Switch to the dough hook and add flour, one cup at a time, until you get a smooth and elastic, but not sticky, dough.  Depending on the size/capacity of your mixer, you may need to knead the dough by hand around cup 4.

Put the dough in a greased bowl and cover with plastic wrap or a plastic grocery store bag.  Let rise until doubled in size, approximately one hour.

Punch dough down and let rest for 10 minutes.  While you're waiting, combine the brown sugar and cinnamon.

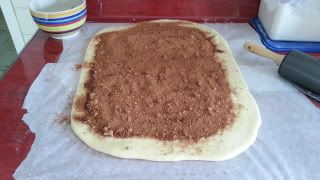
On a well floured surface, roll the dough out into a large square or rectangular shape (mine was about 12" x 6", but the exact size here doesn't really matter - you just need to roll it out into something large enough for you to roll back up).  Brush the dough with the melted butter and top with the cinnamon-sugar mixture.


  photo 20130303_101248_zps96cae9f7.jpg

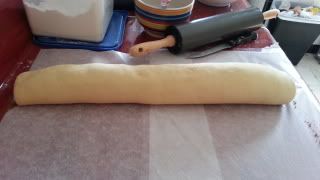
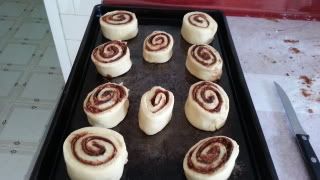
Starting with the long end, roll the dough into a cylinder.  Pinch the seam.  Leaving the seam side down, cut the log into equal size pieces.

 photo 20130303_101629_zpse8938bdb.jpg

Place each roll onto a greased cookie sheet about 1-2 inches apart.

 photo 20130303_102205_zps38112cd9.jpg

Bake at 350°F for about 20 minutes, until light brown.  The filling will be melted and a toothpick inserted into the center should come out clean.

 photo 20130303_104521_zpsa4521b6c.jpg

Let cool on the pan for 5 minutes.  Combine the glaze ingredients, then drizzle over top of the cinnamon buns.  Serve warm.

Yields 8-10 cinnamon buns, depending on size.

 photo 20130303_105010_zpsda581d82.jpg

Friday, March 1, 2013

Peanut Butter Cup Brownies

It's National Peanut Butter day!  OK, so I didn't know that was actually a thing until this morning, but I figured that it was perfect timing for me to post the peanut butter cup brownies I made.

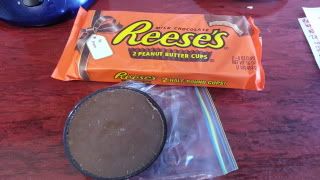
For Christmas, Joe's sister got us a huge thing of Reese's Peanut Butter Cups.  I don't even know how to describe this to you, so I'll just show you a picture instead:

 photo 20130223_112859_zps79bc3b68.jpg

Can you see what it says on the package? That package has two HALF POUND peanut butter cups in it.  I bought Joe one of these for Christmas a couple years ago, and one peanut butter cup was still in the fridge.  He said it tasted amazing, but was basically impossible to eat.  ESPECIALLY because he's a genius and put it in the fridge in the first place (sarcasm). 

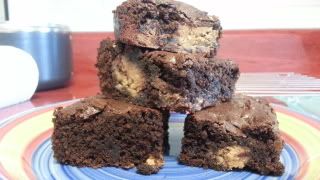
So, I had three of these things on hand and I wanted to do something with them.  I was originally thinking cookies, but then I decided that I hadn't made brownies in awhile, and there's not too many things that are better than a peanut butter brownie.  So, I chopped up one peanut butter cup and threw it in the brownie batter.  The result was just what I was looking for: a rich, chocolatey and chewy brownie with thick pockets of peanut butter throughout. They're sitting on the counter in the kitchen and I'm sitting here practically drooling as I write about them.

Peanut Butter Cup Brownies
Modified from Hershey's
To print this recipe, click here

 photo 20130223_135033_zps631f14b7.jpg


3/4 c. Hershey's unsweetened cocoa
1/2 tsp. baking soda
2/3 c. butter, melted and divided
1/2 c. boiling water
2 c. sugar
2 eggs
1 1/3 c. flour
1 tsp. vanilla extract
1 1/2 c. Reese's Peanut Butter Cups, chopped

Preheat oven to 350°F.  Grease a 13" x 9" baking pan.

In a large bowl, combine cocoa, baking soda and 1/3 cup butter.  Add boiling water and stir until mixture thickens.  Mix in sugar, eggs and remaining 1/3 cup butter; stir until smooth.  Add flour and vanilla and stir until thoroughly combined.  Fold in peanut butter cups.  Pour batter into prepared pan.

Bake 30-35 minutes, until top edges of brownies begin to pull away from the pan and a toothpick inserted comes out clean.

Cool in pan on wire rack.  Cut into squares.  Yields about 36 brownies (depending on size).