These are certainly not new to the internet, but they're to my kitchen and my mouth.
As for what they are: a little slice of heaven on earth.
No, that's not quite right. Well, it is, but that doesn't help you. It's really like your two favorite cookies got together and had a baby.
Make chocolate chip cookies. Put oreo inside. Pour glass of milk. Enjoy.
I've seen this online before and passed them by, assuming that they were difficult and time consuming to make. They're not. Well, they are a little time consuming, but only by a few minutes compared to regular chocolate chip cookies.
I used my normal chocolate chip cookie recipe, then added about an extra cup of flour so the dough would be a little stiffer and more likely to do what I wanted it to do. You can use double stuff or regular Oreos for these - whatever your little heart desires. I made most of mine with regular but threw in a few double stuff for a surprise.
You're basically using two chocolate chip cookies for every one Oreo stuffed cookie, so you'll only get about 24 cookies or so out of this recipe. The thing is, you really only need to eat one, since it's kind of the equivalent of eating three cookies at once. Joe thought these were a little too sweet, but my brother, friends, 2 year old nephew and a coworker thought they were perfect (okay, so my nephew didn't *quite* know what to make of these bad boys, but he was still interested). If you're debating about which cookies to use, I would suggest the regular Oreos. The reason here is simple: this cookies are HUGE. It's easier to eat and enjoy when you can actually get it in your mouth to take a bite... and when you can dunk it in a nice glass of cold milk. Mmmm.
Have I sold you yet? Go make some right now!
Oreo Stuffed Chocolate Chip Cookies
2 sticks butter, room temperatue
2 eggs
1 tsp. baking soda
1 tsp. vanilla extract
3/4 c. brown sugar
3/4 c. granulated sugar
3 1/2 c. flour
2 c. chocolate chips
approx. 24 Oreo sandwich cookies
Preheat oven to 350°F.
In a large bowl, combine butter, eggs, baking soda and sugars. Mix in flour, one cup at a time. Fold in chocolate chips.
Using a cookie scoop or tablespoon, place one scoop of cookie dough in the palm of your hand and lightly flatten. Place one Oreo cookie on top. Place a second scoop of cookie dough on top of Oreo; use your hands to mold the cookie dough around the Oreo. Repeat for remaining dough and cookies.
Place on a cookie sheet about 2 inches apart (you can pack them a little tighter if needed as they don't expand too much). Bake for 10 minutes until very lightly golden brown. Let cool on cookie sheet for a couple of minutes, them transfer to wire rack to cool completely.
Showing posts with label cookies. Show all posts
Monday, July 7, 2014
Saturday, June 14, 2014
Watermelon Slice Cookies
YOU GUYS.
I don't even know what to say about these cookies. Really. I should probably just let the pictures speak for themselves.
These are little butter cookies. Not just any butter cookies, though. No. These ones look like watermelons.
WATERMELONS.
But they're cookies.
And, they're awesome.
I brought them to a family cookout and the little kids could not. stop. eating them. Sometimes I don't know where to put things at family parties, so I just put my dessert on the table and walk away, knowing that somebody else will know the right place for it to be. This time around, about 5 minutes after I walked away, one of Joe's little cousins saw the cookies and asked her mom if she could have some. When desserts finally came out, she kept running over to get a couple at a time. OK, so then she turned to the brownies and chocolate chip cookies - smart girl.
Actually, Joe liked these too. Which, actually is hilarious. Here, let me give you a mental image so that you can enjoy, too: Joe has a big beard and looks like he's a real tough guy. Got a good picture? Ok, now imagine that guy eating a handful of these:
Seriously, though. These cookies are awesome.
They're time consuming, but really easy. Most of the time, the dough is in the fridge or freezer and you're just waiting for it to firm up a little bit so you can work with it without making a mess or getting the colors mixed up.
The log gets misshapen everytime you slice a cookie, so make sure to keep rolling it so that it stays somewhat round. It doesn't have to perfect, because you're going to slice the cookies in half once they come out of the oven, anyway. Do this part immediately so that you get a nice, clean cut. You might also want to sprinkle a little bit of sugar on top of these before you bake them. I didn't do this, but I think it would add a nice touch and a little extra flavor. The sugar crystals would help them look like glistening, juicy watermelon slices.
Man, watermelon's my favorite.
I left these cooling on the counter while I went to the dollar store to find something to put them in to bring them to said cookout. When I got home and saw these cuties sitting on the counter, I squealed with delight. The only bummer is that I forgot to set some cookies aside for me and I forgot to bring them home when we left the cookout.
I mentioned making these to Joe again and he's going to see about getting me some watermelon extract (Google and Amazon say this exists - anyone ever tried it?) so that they can look AND taste like watermelons.
What's the last food you made that looked like a different food?
Watermelon Slice Cookies
3/4 cup butter, softened
3/4 cup sugar
1 egg
1 teaspoon vanilla
2 cups flour
1/4 teaspoon baking powder
red and green food coloring
mini chocolate chips (I did not measure these - maybe about 2-3 Tbsp)
In a large bowl, cream butter and sugar until light and fluffy. Stir in egg and vanilla. Add baking powder and flour and beat well. Measure out 1 cup of dough and set aside
Tint remaining dough red and shape it into a roll approximately 3 1/2 inches long. Wrap it in plastic wrap and put in freezer to firm up - about 10-15 minutes.
With the 1 cup of dough that you set aside, tint 1/3 of it green. Wrap it in plastic wrap and put it in fridge or freezer until firm. The 2/3 of the remaining dough will be left its natural color. Wrap in plastic wrap and put in fridge until firm.
On a lightly floured surface, roll the plain dough into a rectangle, approximately 3 1/2 inches by 8 inches. Unwrap the chilled red dough and roll it up into the plain dough. Make sure you wrap it snuggly. Roll it around on the counter to seal the two layers together. Wrap back up and freeze until firm.
On a lightly floured surface, roll the green dough into a 3 1/2 inch by 9 inch rectangle. Roll the chilled dough up snuggly in the green dough. Roll to seal the layers together. Wrap back up in plastic wrap and chill in freezer until firm.
Preheat oven to 350°F. Unwrap dough and cut into slices about 1/4" thick. Every few slices, roll dough so that it doesn't get too out of round. Place cookie slices on an ungreased cookie sheet. Press mini chocolate chips into the red part of each cookie slice, pointy side down.
Bake 9 to 11 minutes or until firm. Remove from oven and immediately cut cookies in half while hot. I used a small paring knife. Let cool on cookie sheet for a couple of minutes, then carefully transfer to a wire rack to cool completely.
I don't even know what to say about these cookies. Really. I should probably just let the pictures speak for themselves.
These are little butter cookies. Not just any butter cookies, though. No. These ones look like watermelons.
WATERMELONS.
But they're cookies.
And, they're awesome.
I brought them to a family cookout and the little kids could not. stop. eating them. Sometimes I don't know where to put things at family parties, so I just put my dessert on the table and walk away, knowing that somebody else will know the right place for it to be. This time around, about 5 minutes after I walked away, one of Joe's little cousins saw the cookies and asked her mom if she could have some. When desserts finally came out, she kept running over to get a couple at a time. OK, so then she turned to the brownies and chocolate chip cookies - smart girl.
Actually, Joe liked these too. Which, actually is hilarious. Here, let me give you a mental image so that you can enjoy, too: Joe has a big beard and looks like he's a real tough guy. Got a good picture? Ok, now imagine that guy eating a handful of these:
Seriously, though. These cookies are awesome.
They're time consuming, but really easy. Most of the time, the dough is in the fridge or freezer and you're just waiting for it to firm up a little bit so you can work with it without making a mess or getting the colors mixed up.
The log gets misshapen everytime you slice a cookie, so make sure to keep rolling it so that it stays somewhat round. It doesn't have to perfect, because you're going to slice the cookies in half once they come out of the oven, anyway. Do this part immediately so that you get a nice, clean cut. You might also want to sprinkle a little bit of sugar on top of these before you bake them. I didn't do this, but I think it would add a nice touch and a little extra flavor. The sugar crystals would help them look like glistening, juicy watermelon slices.
Man, watermelon's my favorite.
I left these cooling on the counter while I went to the dollar store to find something to put them in to bring them to said cookout. When I got home and saw these cuties sitting on the counter, I squealed with delight. The only bummer is that I forgot to set some cookies aside for me and I forgot to bring them home when we left the cookout.
I mentioned making these to Joe again and he's going to see about getting me some watermelon extract (Google and Amazon say this exists - anyone ever tried it?) so that they can look AND taste like watermelons.
What's the last food you made that looked like a different food?
Watermelon Slice Cookies
3/4 cup butter, softened
3/4 cup sugar
1 egg
1 teaspoon vanilla
2 cups flour
1/4 teaspoon baking powder
red and green food coloring
mini chocolate chips (I did not measure these - maybe about 2-3 Tbsp)
In a large bowl, cream butter and sugar until light and fluffy. Stir in egg and vanilla. Add baking powder and flour and beat well. Measure out 1 cup of dough and set aside
Tint remaining dough red and shape it into a roll approximately 3 1/2 inches long. Wrap it in plastic wrap and put in freezer to firm up - about 10-15 minutes.
With the 1 cup of dough that you set aside, tint 1/3 of it green. Wrap it in plastic wrap and put it in fridge or freezer until firm. The 2/3 of the remaining dough will be left its natural color. Wrap in plastic wrap and put in fridge until firm.
On a lightly floured surface, roll the plain dough into a rectangle, approximately 3 1/2 inches by 8 inches. Unwrap the chilled red dough and roll it up into the plain dough. Make sure you wrap it snuggly. Roll it around on the counter to seal the two layers together. Wrap back up and freeze until firm.
On a lightly floured surface, roll the green dough into a 3 1/2 inch by 9 inch rectangle. Roll the chilled dough up snuggly in the green dough. Roll to seal the layers together. Wrap back up in plastic wrap and chill in freezer until firm.
Preheat oven to 350°F. Unwrap dough and cut into slices about 1/4" thick. Every few slices, roll dough so that it doesn't get too out of round. Place cookie slices on an ungreased cookie sheet. Press mini chocolate chips into the red part of each cookie slice, pointy side down.
Bake 9 to 11 minutes or until firm. Remove from oven and immediately cut cookies in half while hot. I used a small paring knife. Let cool on cookie sheet for a couple of minutes, then carefully transfer to a wire rack to cool completely.
Labels:
cookies
Sunday, April 13, 2014
Kosher for Passover: Chocolate Chip Cookies
Passover is literally hours away, and I started cooking some things yesterday. I've probably mentioned this before, but now that I have a real grown up job, it's difficult for me to bake and cook during the week, so I try to do what I can over the weekend.
If you're anything like me and my family, you find that the hardest part about Passover is noshing, or finding a good snack. Sure, I have 2 containers of macaroons in the closet, and yeah, they're alright, but after a few days of them? Bo-ring! The only problem is that those box mixes or pre-packaged things are equally pretty terrible. Sometimes, the flavor is there, but man, they're so dry!
I cobbled this recipe after finding some online that had things about them I didn't like or couldn't use. Like flour. Since I'm writing this on Sunday morning, my family has yet to try them. However, I ate a few yesterday - quality control and all that - and I was pleasantly surprised. While they don't quite taste or behave like your normal cookies, these are the best tasting Passover cookies I've ever had.
Let me say that again, just so we can be clear: do NOT compare these to your favorite, everyday chocolate chip cookie recipe. If you compare them to that recipe, they will fall far short of your expectations.
However, if you look at these compared to other Passover treats, you will be pleasantly surprised. Yes, you can still taste the matzah, but for me, it's more of a muted, nutty flavor than an actual matzah flavor. I made some of these as chocolate chip cookies and some as double chocolate chip cookies, and while the flavor is a bit more muted in the double chocolate, you will not get rid of it altogether. Frankly, I gave up trying to hide the matzah flavor years ago. I don't really mind the taste of matzah, so why hide it when I can embrace it instead?
These aren't going to bake up or behave quite like your regular cookies, either. You can fit more of these on a pan because they don't really spread out. I used my cookie scoop, and they pretty much just stayed in that round ball shape. To remedy this, I just gently tapped them with the bottom of a glass. You can do this before or after they come out of the oven. Out of the oven is a little easier, though you may want to grease the glass a little bit just to make sure you don't lose any good chocolate chips.
Also, if you don't have molasses in your cabinet, no big deal. You can substitute the granulated sugar + molasses combination for the same amount of brown sugar (in this case, 1 1/2 cups). The flavor will be the same, but I found that the molasses gave the cookies some extra moisture that was lacking when I used just brown sugar. If your family prefers nuts in their cookies - go ahead and add those too! The great part about this is that it's pretty customizable to whatever tastes and flavors you prefer.
I am sure my family will enjoy these, and I hope your family does, too. Chag Sameach!
Kosher for Passover Chocolate Chip Cookies
2 sticks butter, room temperature
2 Tbsp honey
2 tsp vanilla extract
1 1/2 c. granulated sugar
3 Tbsp molasses
2 eggs
1 1/2 c. matzah cake meal
1/4 c. matzah meal
10 oz. bag (2 cups) kosher for Passover chocolate chips
Preheat oven to 350°F. Grease cookie sheets and set aside.
In a large bowl, combine butter, honey, vanilla, sugar and molasses until smooth and creamy.
Stir in the eggs and mix well.
Add cake meal and matzah meal; stir until combined.
Fold in chocolate chips.
Drop by rounded teaspoon onto prepared cookie sheets. Bake 10-12 minutes, until cookies are set and tops are lightly browned. Remove from oven and gently tap cookies with the bottom of a glass to round them out. Let cool for a few minutes, then transfer to a wire rack to cool completely.
Pour a tall glass of milk and enjoy!
If you're anything like me and my family, you find that the hardest part about Passover is noshing, or finding a good snack. Sure, I have 2 containers of macaroons in the closet, and yeah, they're alright, but after a few days of them? Bo-ring! The only problem is that those box mixes or pre-packaged things are equally pretty terrible. Sometimes, the flavor is there, but man, they're so dry!
I cobbled this recipe after finding some online that had things about them I didn't like or couldn't use. Like flour. Since I'm writing this on Sunday morning, my family has yet to try them. However, I ate a few yesterday - quality control and all that - and I was pleasantly surprised. While they don't quite taste or behave like your normal cookies, these are the best tasting Passover cookies I've ever had.
Let me say that again, just so we can be clear: do NOT compare these to your favorite, everyday chocolate chip cookie recipe. If you compare them to that recipe, they will fall far short of your expectations.
However, if you look at these compared to other Passover treats, you will be pleasantly surprised. Yes, you can still taste the matzah, but for me, it's more of a muted, nutty flavor than an actual matzah flavor. I made some of these as chocolate chip cookies and some as double chocolate chip cookies, and while the flavor is a bit more muted in the double chocolate, you will not get rid of it altogether. Frankly, I gave up trying to hide the matzah flavor years ago. I don't really mind the taste of matzah, so why hide it when I can embrace it instead?
These aren't going to bake up or behave quite like your regular cookies, either. You can fit more of these on a pan because they don't really spread out. I used my cookie scoop, and they pretty much just stayed in that round ball shape. To remedy this, I just gently tapped them with the bottom of a glass. You can do this before or after they come out of the oven. Out of the oven is a little easier, though you may want to grease the glass a little bit just to make sure you don't lose any good chocolate chips.
Also, if you don't have molasses in your cabinet, no big deal. You can substitute the granulated sugar + molasses combination for the same amount of brown sugar (in this case, 1 1/2 cups). The flavor will be the same, but I found that the molasses gave the cookies some extra moisture that was lacking when I used just brown sugar. If your family prefers nuts in their cookies - go ahead and add those too! The great part about this is that it's pretty customizable to whatever tastes and flavors you prefer.
I am sure my family will enjoy these, and I hope your family does, too. Chag Sameach!
Kosher for Passover Chocolate Chip Cookies
2 sticks butter, room temperature
2 Tbsp honey
2 tsp vanilla extract
1 1/2 c. granulated sugar
3 Tbsp molasses
2 eggs
1 1/2 c. matzah cake meal
1/4 c. matzah meal
10 oz. bag (2 cups) kosher for Passover chocolate chips
Preheat oven to 350°F. Grease cookie sheets and set aside.
In a large bowl, combine butter, honey, vanilla, sugar and molasses until smooth and creamy.
Stir in the eggs and mix well.
Add cake meal and matzah meal; stir until combined.
Fold in chocolate chips.
Drop by rounded teaspoon onto prepared cookie sheets. Bake 10-12 minutes, until cookies are set and tops are lightly browned. Remove from oven and gently tap cookies with the bottom of a glass to round them out. Let cool for a few minutes, then transfer to a wire rack to cool completely.
Pour a tall glass of milk and enjoy!
Tuesday, January 21, 2014
Triple Chocolate Chip Cookies
By now, it should be a well known fact that I'm a chocoholic. If it's got chocolate, I'm interested. At the same time, Joe is pretty much the human version of Cookie Monster.
So, what do you when you're craving something seriously chocolatey and you know that your future husband would like something in cookie form?
Make these babies.
Chocolate cookies with semi-sweet, white chocolate and dark chocolate chips. Go ahead and pour yourself a tall glass of (chocolate) milk to go with them - you'll need it. YUM.
I told Joe that I only made a half batch of these because I wasn't sure if he would like them (turns out there is such a thing as "too chocolatey"), but I really only made a half batch because I knew I would literally inhale these. It's too bad, because now I wish I had more.
Guess I'll have to make some!
Triple Chocolate Chip Cookies
1 stick butter, room temperature
1/2 cup sugar
1/2 cup brown sugar
1 egg
1 tsp vanilla extract
1 tsp baking soda
1/4 tsp salt
2 Tbsp unsweetened cocoa powder
1 1/2 c. flour
1/2 c. white chocolate chips
1/2 c. milk chocolate chips
1/2 c. dark chocolate chips
Preheat oven to 350ºF. Grease cookie sheets and set aside.
Combine all ingredients except for flour and chocolate chips. Mix in flour until combined. Fold in chocolate chips.
Drop by rounded teaspoon onto cookie sheets (I used a cookie scoop that makes cookies 2"-3" diameter). Bake for 9 minutes. Allow cookies to cool for a few minutes on cookie sheets, then transfer to a wire rack to cool completely
So, what do you when you're craving something seriously chocolatey and you know that your future husband would like something in cookie form?
Make these babies.
Chocolate cookies with semi-sweet, white chocolate and dark chocolate chips. Go ahead and pour yourself a tall glass of (chocolate) milk to go with them - you'll need it. YUM.
I told Joe that I only made a half batch of these because I wasn't sure if he would like them (turns out there is such a thing as "too chocolatey"), but I really only made a half batch because I knew I would literally inhale these. It's too bad, because now I wish I had more.
Guess I'll have to make some!
Triple Chocolate Chip Cookies
1 stick butter, room temperature
1/2 cup sugar
1/2 cup brown sugar
1 egg
1 tsp vanilla extract
1 tsp baking soda
1/4 tsp salt
2 Tbsp unsweetened cocoa powder
1 1/2 c. flour
1/2 c. white chocolate chips
1/2 c. milk chocolate chips
1/2 c. dark chocolate chips
Preheat oven to 350ºF. Grease cookie sheets and set aside.
Combine all ingredients except for flour and chocolate chips. Mix in flour until combined. Fold in chocolate chips.
Drop by rounded teaspoon onto cookie sheets (I used a cookie scoop that makes cookies 2"-3" diameter). Bake for 9 minutes. Allow cookies to cool for a few minutes on cookie sheets, then transfer to a wire rack to cool completely
Saturday, January 18, 2014
Banana Oatmeal Chocolate Chip Cookies
I'm sure I've mentioned my love/hate relationship with bananas before. Mostly, I just have trouble eating them before they go bad. In theory, this is no big deal, because I love turning my rotten bannas into something else. In practice, though, it's kind of annoying, because I never know what else to make besides banana bread. And, while I LOVE banana bread, there are only so many variations you can make of it before that gets boring, too.
These cookies are a mouthful... literally. I've made these a few times and every time, I try to think of an easier name for them, but I keep drawing a blank. The name is a lot to say, but they're so easy to make that it's definitely worth it. I'm pretty sure that my brother has eaten an entire container of these by himself without thinking twice about it.
For me, these cookies are perfect as a snack, but I've been known to have a few (or maybe 5 or 6) for breakfast. I'm probably just deluding myself into thinking that the oatmeal makes these way healthier than they are, but all things considered, I'm pretty sure these are pretty decent. I mean, oatmeal's good for you!
What helps me feel better about it, right?
The awesome part about this recipe is that you can pretty much make any substitutions you want and you'll still get something delicious. I normally use regular all-purpose flour and old-fashioned oats, but I've also made these with whole wheat flour and quick oats. Making it this way, you get a little bit of a wetter batter, but no discernible taste difference. I also like to substitute dark chocolate chunks or chips instead of semisweet chips. While they taste good, I find that the dark chocolate tends to mask or overpower the banana flavor. Nest time, I might do a combination of dark chocolate and semisweet chocolate chips and see what happens.
You'll notice that the cook time on these is a little bit longer than the cook time on pretty much any other cookie I make. The banana makes these cookies really moist which does two things: first, it means they can hang around for a little longer before they're get too dry and stale. Second, it means you end up with a really wet batter that takes a little longer to cook! Fret not, though, because even though you're cooking them for about 10 minutes, you still get a really moist and chewy cookie with a TON of banana and chocolatey flavor.
What's your favorite thing to make with bananas?
Banana Oatmeal Chocolate Chip Cookies
1 1/2 stick butter, softened
1 1/2 ripe bananas
1/2 tsp. baking soda
1/2 c. granulated sugar
1/2 c. brown sugar
1 egg
1 tsp. vanilla extract
1 c. flour
2 c. old fashioned oats
2 c. semisweet chocolate chips.
Combine all ingredients except flour, oats and chocolate chips. Stir in the flour, then the oats, then the chocolate chips. Batter will be wet.
Drop by rounded teaspoon onto greased cookie sheet.
Bake at 375°F for 10 minutes or until the tops of the cookies are dry. Let cool on cookie sheets for two minutes, then transfer to wire rack to cool completely.
Try not to eat them all in the meantime!
These cookies are a mouthful... literally. I've made these a few times and every time, I try to think of an easier name for them, but I keep drawing a blank. The name is a lot to say, but they're so easy to make that it's definitely worth it. I'm pretty sure that my brother has eaten an entire container of these by himself without thinking twice about it.
For me, these cookies are perfect as a snack, but I've been known to have a few (or maybe 5 or 6) for breakfast. I'm probably just deluding myself into thinking that the oatmeal makes these way healthier than they are, but all things considered, I'm pretty sure these are pretty decent. I mean, oatmeal's good for you!
What helps me feel better about it, right?
The awesome part about this recipe is that you can pretty much make any substitutions you want and you'll still get something delicious. I normally use regular all-purpose flour and old-fashioned oats, but I've also made these with whole wheat flour and quick oats. Making it this way, you get a little bit of a wetter batter, but no discernible taste difference. I also like to substitute dark chocolate chunks or chips instead of semisweet chips. While they taste good, I find that the dark chocolate tends to mask or overpower the banana flavor. Nest time, I might do a combination of dark chocolate and semisweet chocolate chips and see what happens.
You'll notice that the cook time on these is a little bit longer than the cook time on pretty much any other cookie I make. The banana makes these cookies really moist which does two things: first, it means they can hang around for a little longer before they're get too dry and stale. Second, it means you end up with a really wet batter that takes a little longer to cook! Fret not, though, because even though you're cooking them for about 10 minutes, you still get a really moist and chewy cookie with a TON of banana and chocolatey flavor.
What's your favorite thing to make with bananas?
Banana Oatmeal Chocolate Chip Cookies
1 1/2 stick butter, softened
1 1/2 ripe bananas
1/2 tsp. baking soda
1/2 c. granulated sugar
1/2 c. brown sugar
1 egg
1 tsp. vanilla extract
1 c. flour
2 c. old fashioned oats
2 c. semisweet chocolate chips.
Combine all ingredients except flour, oats and chocolate chips. Stir in the flour, then the oats, then the chocolate chips. Batter will be wet.
Drop by rounded teaspoon onto greased cookie sheet.
Bake at 375°F for 10 minutes or until the tops of the cookies are dry. Let cool on cookie sheets for two minutes, then transfer to wire rack to cool completely.
Try not to eat them all in the meantime!
Tuesday, January 14, 2014
Oatmeal Cream Pies
When I first met Joe, I'm pretty sure the only reason he was still alive was because of Little Debbie, but especially because of her oatmeal cream pies.
For years, I've been looking for recipes and trying to figure out a way to reproduce these things. If you're not familiar with them, oatmeal cream pies are two soft-baked oatmeal cookies with a light, marshmallow frosting in the middle. I'm not positive, but I suspect the secret ingredient might be crack or something other addictive substance, because they are THAT good.
The thing is, I knew I could make them better and more delicious. And, perhaps, a tiny bit healthier, with ingredients that I knew how to pronounce and knew where they came from and/or how they came to be in my kitchen.
And, then, one day, like manna from heaven, I stumbled on a recipe. I tweaked the recipe a bit, but you can adjust it to your liking. We had one of our couple friends over for dinner, and the boyfriend was so excited when he saw the photo on Facebook. We're trying to make a date to hang out again, and he suggested a dinner party - while it sounds like a great idea, I think he just wants me to make more of these!
I used my cookie scoop for these because I wanted to make sure that they were all the same size - easier to make sandwiches that way! Don't pack these cookies too tight when you bake them, because they will definitely spread out a little bit. If it helps, mine were about 3 inches in diameter - about the same size as the store bought ones. You'll also want to make sure you store these in an airtight container. Mine were in an airtight container, and I'm not sure if it's because someone didn't close it right or just the nature of the recipe, but the marshmallow-like filling got a little hard around the edges. It's not enough to discourage eating them, but is something to be aware of.
I had been looking for a recipe like this for so long that I wasn't quite sure what to expect, but I was pleasantly surprised - these were SO good and pretty addicting. You probably have everything you need to make them, (well, maybe not the oatmeal), making them much cheaper than the kind you buy at the store. Winning!
Oatmeal Cream Pies
For the cookies:
1 c. (2 sticks) butter, room temperature
3/4 c. brown sugar
1/2 c. sugar
2 eggs
1 tsp. vanilla extract
1 Tbsp maple syrup
1 3/4 c. flour
1 tsp. baking soda
1 tsp. cinnamon
1 1/2 c. quick cooking oats
Preheat oven to 350°F and grease cookie sheets; set aside.
In a small bowl, whisk together flour, baking soda and cinnamon.
In the bowl of a stand mixer fitted with the paddle attachment, cream together butter and sugars until light and fluffy. Add eggs, syrup and vanilla and beat until incorporated.
Gradually add the flour mixture into the bitter; mix just until incorporated. Stir in oats until evenly distributed. Cover bowl and chill in the refrigerator for 15 minutes.
Remove dough from refrigerator. Drop by rounded tablespoons onto baking sheet. Bake for 10 minutes until the edges are browned and middles are mostly set. Let cool on baking sheet for a couple of minutes, then transfer to a wire rack to cool completely.
For the filling:
2 egg whites
1/2 c. sugar
1/4 tsp. cream of tartar
1/2 tsp. vanilla extract
In a double boiler, add egg whites, sugar and cream of tartar; heat over simmering water (I used a glass pyrex bowl set inside of a small saucepan filled with enough water to touch the bottom of the bowl). Whisking frequently, heat until egg whites become frothy and sugar is dissolved, approx. 160°F. Carefully add egg mixture to the bowl of a stand mixer fitted with the whisk attachment. Whisk on high speed for several minutes, until stiff peaks form. Carefully fold in the vanilla. (*Note: I couldn't find my candy thermometer, so I just kept mine on the double boiler the entire time. Doing it this way, I was still able to get a fluffy and marshmallow-y frosting.)
Add frosting to the bottom of one cookie and top with a second cookie.
For years, I've been looking for recipes and trying to figure out a way to reproduce these things. If you're not familiar with them, oatmeal cream pies are two soft-baked oatmeal cookies with a light, marshmallow frosting in the middle. I'm not positive, but I suspect the secret ingredient might be crack or something other addictive substance, because they are THAT good.
The thing is, I knew I could make them better and more delicious. And, perhaps, a tiny bit healthier, with ingredients that I knew how to pronounce and knew where they came from and/or how they came to be in my kitchen.
And, then, one day, like manna from heaven, I stumbled on a recipe. I tweaked the recipe a bit, but you can adjust it to your liking. We had one of our couple friends over for dinner, and the boyfriend was so excited when he saw the photo on Facebook. We're trying to make a date to hang out again, and he suggested a dinner party - while it sounds like a great idea, I think he just wants me to make more of these!
I used my cookie scoop for these because I wanted to make sure that they were all the same size - easier to make sandwiches that way! Don't pack these cookies too tight when you bake them, because they will definitely spread out a little bit. If it helps, mine were about 3 inches in diameter - about the same size as the store bought ones. You'll also want to make sure you store these in an airtight container. Mine were in an airtight container, and I'm not sure if it's because someone didn't close it right or just the nature of the recipe, but the marshmallow-like filling got a little hard around the edges. It's not enough to discourage eating them, but is something to be aware of.
I had been looking for a recipe like this for so long that I wasn't quite sure what to expect, but I was pleasantly surprised - these were SO good and pretty addicting. You probably have everything you need to make them, (well, maybe not the oatmeal), making them much cheaper than the kind you buy at the store. Winning!
Oatmeal Cream Pies
For the cookies:
1 c. (2 sticks) butter, room temperature
3/4 c. brown sugar
1/2 c. sugar
2 eggs
1 tsp. vanilla extract
1 Tbsp maple syrup
1 3/4 c. flour
1 tsp. baking soda
1 tsp. cinnamon
1 1/2 c. quick cooking oats
Preheat oven to 350°F and grease cookie sheets; set aside.
In a small bowl, whisk together flour, baking soda and cinnamon.
In the bowl of a stand mixer fitted with the paddle attachment, cream together butter and sugars until light and fluffy. Add eggs, syrup and vanilla and beat until incorporated.
Gradually add the flour mixture into the bitter; mix just until incorporated. Stir in oats until evenly distributed. Cover bowl and chill in the refrigerator for 15 minutes.
Remove dough from refrigerator. Drop by rounded tablespoons onto baking sheet. Bake for 10 minutes until the edges are browned and middles are mostly set. Let cool on baking sheet for a couple of minutes, then transfer to a wire rack to cool completely.
For the filling:
2 egg whites
1/2 c. sugar
1/4 tsp. cream of tartar
1/2 tsp. vanilla extract
In a double boiler, add egg whites, sugar and cream of tartar; heat over simmering water (I used a glass pyrex bowl set inside of a small saucepan filled with enough water to touch the bottom of the bowl). Whisking frequently, heat until egg whites become frothy and sugar is dissolved, approx. 160°F. Carefully add egg mixture to the bowl of a stand mixer fitted with the whisk attachment. Whisk on high speed for several minutes, until stiff peaks form. Carefully fold in the vanilla. (*Note: I couldn't find my candy thermometer, so I just kept mine on the double boiler the entire time. Doing it this way, I was still able to get a fluffy and marshmallow-y frosting.)
Add frosting to the bottom of one cookie and top with a second cookie.
Tuesday, January 7, 2014
Peanut Butter Blossoms
You've probably seen these a million times recently, since lots of people make these for Christmas. Hell, you've probably even made them yourself. I, on the other hand, have made these exactly twice in my entire life. The first time I made these, Joe still live in his dingy bachelor pad downtown. I remember that I had to go out and specially purchase everything I needed - butter, peanut butter, cookie sheets, etc. The man had the bare essentials and that was it. He did have one cookie sheet, but it was questionable looking. He had been talking about these and I remarked "are you kidding, those are so easy to make!" and then he asked me if I could make them for him. I did, and then never made them again.
What a jerk.
See, it turns out that chocolate + peanut butter is Joe's favorite combination. It also turns out that Hershey Kisses are my kryptonite. You'd think that having to unwrap them in order to eat them would slow me down, but I think I see it as more of a challenge than anything else. The tricky part with these cookies is that you have to unwrap the chocolates first, since you need to be able to press them into the cookies right away. See the problem?
We were having some friends over and I hadn't made them in awhile (about 8 years, if you were wondering), so I decided it was about time to resurrect these babies. Also... I really wanted some Hershey Kisses.
My self control paid off, since I had about a dozen chocolates left over that I could eat without feeling guilty (or giving myself a tummy ache) and everybody loved the cookies. Also, Joe might have made a funny little shriek/squeal noise when he saw them cooling on the counter.
Peanut Butter Blossoms
48 Hershey Kisses, unwrapped
1/2 c. shortening
3/4 c. creamy peanut butter
1/3 c. granulated sugar
1/3 c. packed brown sugar
1 egg
2 Tbsp milk
1 tsp vanilla extract
1 1/2 c. flour
1 tsp baking soda
1/2 tsp salt
1/3 c. granulated sugar, for rolling
Preheat oven to 375°F. Lightly grease cookie sheets and set aside. Place the additional sugar on a small plate or in a bowl and set aside.
In a large bowl, beat shortening and peanut butter until well blended. Add sugars and beat until fluffy. Add egg, milk and vanilla; stir until incorporated. Combine baking soda and flour and gradually beat into peanut butter mixture.
Shape dough into 1-inch balls and roll in sugar. Place on baking sheet. Bake 8-10 minutes, until lightly browned (I baked mine for 8 minutes). Remove from oven and immediately press a chocolate into the center of each cookie. The cookies will crack around the edges. Let cool for a couple of minutes on the cookie sheet, then remove to a wire rack to cool completely.
What a jerk.
See, it turns out that chocolate + peanut butter is Joe's favorite combination. It also turns out that Hershey Kisses are my kryptonite. You'd think that having to unwrap them in order to eat them would slow me down, but I think I see it as more of a challenge than anything else. The tricky part with these cookies is that you have to unwrap the chocolates first, since you need to be able to press them into the cookies right away. See the problem?
We were having some friends over and I hadn't made them in awhile (about 8 years, if you were wondering), so I decided it was about time to resurrect these babies. Also... I really wanted some Hershey Kisses.
My self control paid off, since I had about a dozen chocolates left over that I could eat without feeling guilty (or giving myself a tummy ache) and everybody loved the cookies. Also, Joe might have made a funny little shriek/squeal noise when he saw them cooling on the counter.
Peanut Butter Blossoms
48 Hershey Kisses, unwrapped
1/2 c. shortening
3/4 c. creamy peanut butter
1/3 c. granulated sugar
1/3 c. packed brown sugar
1 egg
2 Tbsp milk
1 tsp vanilla extract
1 1/2 c. flour
1 tsp baking soda
1/2 tsp salt
1/3 c. granulated sugar, for rolling
Preheat oven to 375°F. Lightly grease cookie sheets and set aside. Place the additional sugar on a small plate or in a bowl and set aside.
In a large bowl, beat shortening and peanut butter until well blended. Add sugars and beat until fluffy. Add egg, milk and vanilla; stir until incorporated. Combine baking soda and flour and gradually beat into peanut butter mixture.
Shape dough into 1-inch balls and roll in sugar. Place on baking sheet. Bake 8-10 minutes, until lightly browned (I baked mine for 8 minutes). Remove from oven and immediately press a chocolate into the center of each cookie. The cookies will crack around the edges. Let cool for a couple of minutes on the cookie sheet, then remove to a wire rack to cool completely.
Labels:
chocolate,
cookies,
peanut butter
Wednesday, December 4, 2013
No Bake Cookie Dough Bites
I LOVE cookies. Frankly, when it comes to cookies, I'm probably the least picky person on the planet - Oreos, store brand sandwich cookies, fig newtons, peanut butter, oatmeal, those yummy italian cookies that I only get at Christmas... if it's a cookie, I want it. By far, though, my favorite cookie is just regular ol' chocolate chip.
As a kid, I would stand in or near the kitchen, anxiously awaiting mom to say that the cookies were cooled enough for me to take one. Let's be honest - sometimes I didn't even wait. I love it when the cookies are hot and fresh, right out of the oven and the chocolate is so gooey it drips down your chin when you take a bite. Sure, sometimes they were REALLY freakin' hot and I burned myself, but it was all worth it.
Once I started making cookies myself, my favorite part was being able to lick the bowl/spoon without having to share with anybody (the perils of having younger siblings). The only problem is that I have been known to give myself a tummy ache a time or two from eating too much cookie dough. Or brownie batter. Or cake batter. And watermelon. Mmmmmm.
Where was I?
Oh yeah. Chocolate chip cookies. So, my friend Natascha has a son and he just turned two. I told her I was going to make something, but then I had no idea what to make. Last year, I made cupcakes, but so did everyone else. I knew there were going to be a good amount of kids at the party, so I wanted to make something that kids and parents enjoyed but that was super easy for the kids to eat - you know, so they could sneak a couple when mommy and daddy weren't looking.
Cookie dough bites seemed like a great idea. Except for the whole "raw eggs make you sick" thing. I knew I could make a bunch of cookies and then crush them up with some cream cheese to make truffles, but I wanted these to REALLY be cookie dough, just without the eggs. Alas, I knew I needed something to add some moisture to the dough, but I didn't really know what I could use. I knew that applesauce was a good egg substitute, but I didn't have any in the house and wasn't about to go buy some for the small amount that I needed.
I did a ton of googling and it seemed like whatever I was going to do, water was not the right answer. I found some recipes online that used almond/soy/non-dairy milk for similar recipes, and they all had pretty good reviews, so I decided that I could probably use regular, whole dairy milk in my recipe and get similar results.
I tried it and, what do you know - it worked! People, these are freakin' delicious. It's like the best part of the cookie without ever having to turn the oven on! As soon as the kids (and adults) realized that these little balls of chocolate had cookie dough inside, it was all over.
After figuring out the dough, making these was super easy. I did end up shelling out $8 at Target for a cookie scoop, but that's because whenever I make things like this, I have some that are huge and some that are little and some that are in between. When I make regular, baked cookies I don't have a problem getting everything to be the same size, but I thought this project would be a lot easier if I could get the sizing to be consistent. I still can't believe I paid that much for it, but it definitely helped! It felt pretty efficient, too, since I was able to scoop all of them out at once and then roll them all, instead of having to scoop and roll at the same time. My cookie scoop said it makes 2" diameter cookies. That seems like it might be fairly accurate to what I was able to make, and I got about 3 dozen - obviously, you'll get more or less depending on what size you make yours.
These don't take very long, either. Most of the time is waiting for the dough to chill and then waiting for the chocolate set. These were definitely a huge hit at the birthday party, but I think they'd go over well at your holiday party or at a football party. Actually, I think I'm gonna put these on my list for the Superbowl!
What are you waiting for? Go make some!
PS: as it turns out, today is national cookie day. What's your favorite kind of cookie?
No Bake Cookie Dough Bites
1 c. (2 sticks) butter, room temperature
3/4 c. granulated sugar
3/4 c. brown sugar
1 tsp. vanilla extract
2 Tbsp milk
2 1/4 c. flour
1 c. mini chocolate chips
14 oz. chocolate for dipping
Beat butter and sugars until light and fluffy. Add milk and vanilla. Mix in flour and stir by hand until incorporated. Fold in chocolate chips.
Cover and chill dough in refrigerator for about 1 hour.
Form dough into balls about 1-2" diameter and arrange on a baking sheet. Chill for about an hour.
Melt chocolate according to package directions. Working with a few balls at a time, dip the cookie dough balls into the chocolate, letting excess drip off. Place on wax or parchment paper lined cookie sheets. Let chill until chocolate is set. Trim off excess chocolate with a sharp paring knife.
Store in an airtight container for up to one week (although good luck getting them to last that long).
As a kid, I would stand in or near the kitchen, anxiously awaiting mom to say that the cookies were cooled enough for me to take one. Let's be honest - sometimes I didn't even wait. I love it when the cookies are hot and fresh, right out of the oven and the chocolate is so gooey it drips down your chin when you take a bite. Sure, sometimes they were REALLY freakin' hot and I burned myself, but it was all worth it.
Once I started making cookies myself, my favorite part was being able to lick the bowl/spoon without having to share with anybody (the perils of having younger siblings). The only problem is that I have been known to give myself a tummy ache a time or two from eating too much cookie dough. Or brownie batter. Or cake batter. And watermelon. Mmmmmm.
Where was I?
Oh yeah. Chocolate chip cookies. So, my friend Natascha has a son and he just turned two. I told her I was going to make something, but then I had no idea what to make. Last year, I made cupcakes, but so did everyone else. I knew there were going to be a good amount of kids at the party, so I wanted to make something that kids and parents enjoyed but that was super easy for the kids to eat - you know, so they could sneak a couple when mommy and daddy weren't looking.
Cookie dough bites seemed like a great idea. Except for the whole "raw eggs make you sick" thing. I knew I could make a bunch of cookies and then crush them up with some cream cheese to make truffles, but I wanted these to REALLY be cookie dough, just without the eggs. Alas, I knew I needed something to add some moisture to the dough, but I didn't really know what I could use. I knew that applesauce was a good egg substitute, but I didn't have any in the house and wasn't about to go buy some for the small amount that I needed.
I did a ton of googling and it seemed like whatever I was going to do, water was not the right answer. I found some recipes online that used almond/soy/non-dairy milk for similar recipes, and they all had pretty good reviews, so I decided that I could probably use regular, whole dairy milk in my recipe and get similar results.
I tried it and, what do you know - it worked! People, these are freakin' delicious. It's like the best part of the cookie without ever having to turn the oven on! As soon as the kids (and adults) realized that these little balls of chocolate had cookie dough inside, it was all over.
After figuring out the dough, making these was super easy. I did end up shelling out $8 at Target for a cookie scoop, but that's because whenever I make things like this, I have some that are huge and some that are little and some that are in between. When I make regular, baked cookies I don't have a problem getting everything to be the same size, but I thought this project would be a lot easier if I could get the sizing to be consistent. I still can't believe I paid that much for it, but it definitely helped! It felt pretty efficient, too, since I was able to scoop all of them out at once and then roll them all, instead of having to scoop and roll at the same time. My cookie scoop said it makes 2" diameter cookies. That seems like it might be fairly accurate to what I was able to make, and I got about 3 dozen - obviously, you'll get more or less depending on what size you make yours.
These don't take very long, either. Most of the time is waiting for the dough to chill and then waiting for the chocolate set. These were definitely a huge hit at the birthday party, but I think they'd go over well at your holiday party or at a football party. Actually, I think I'm gonna put these on my list for the Superbowl!
What are you waiting for? Go make some!
PS: as it turns out, today is national cookie day. What's your favorite kind of cookie?
No Bake Cookie Dough Bites
1 c. (2 sticks) butter, room temperature
3/4 c. granulated sugar
3/4 c. brown sugar
1 tsp. vanilla extract
2 Tbsp milk
2 1/4 c. flour
1 c. mini chocolate chips
14 oz. chocolate for dipping
Beat butter and sugars until light and fluffy. Add milk and vanilla. Mix in flour and stir by hand until incorporated. Fold in chocolate chips.
Cover and chill dough in refrigerator for about 1 hour.
Form dough into balls about 1-2" diameter and arrange on a baking sheet. Chill for about an hour.
Melt chocolate according to package directions. Working with a few balls at a time, dip the cookie dough balls into the chocolate, letting excess drip off. Place on wax or parchment paper lined cookie sheets. Let chill until chocolate is set. Trim off excess chocolate with a sharp paring knife.
Store in an airtight container for up to one week (although good luck getting them to last that long).
Saturday, November 30, 2013
Chanukah Sugar Cookies
You guys. I have so much to talk about. I know I've been kinda quiet lately... it's because I got a new job! I may have alluded to some unhappiness at work in the past, and this was totally the right move. I now work at a local car dealership as the internet marketing director for the 3 dealerships that are all on the same property. I am responsible for photographing and putting descriptions up of ALL new and used cars.
To give you an idea of how large this company is, the owner has about 50 or so dealerships in the greater Boston and Providence areas. The dealerships run the gamut, from Ford and Honda to BMW and Rolls Royce and everything in between.
It's only been a few weeks, but so far, I LOVE it. Surprisingly, even though I have about 400+ new cars that I need to get photographed and online, the job is way less stress than my last one. People are treating me the way I want and deserve to be treated and seem genuinely happy to have me on board. Also, I get to use my education (imagine that!) and have minimal interactions with customers (pretty much just a smile and a friendly hello when I see them in the show room). Also, there's way more upward growth potential at this job. Overall, I'm thrilled.
So. Thanksgiving just passed and we are in the midst of Chanukah. I have done a TON of baking this past week for the holidays, and have much to show you. I thought it would be overwhelming if I did it all once, though, so I'm breaking them down into different posts. I was originally going to do it in the order of which the things were made, but, obviously, Chanukah cookies are relevant and I wanted to share those first. Also, considering my pretty terrible decorating ability, I'm the most proud of these and wanted to show them off!
Since it's just a basic sugar cookie recipe, this also seemed the most timely so that you can plan to make them for Christmas. Before you ask: I have no idea where to go to acquire Jewish themed cookie cutters. I figured if anyone would have them, it would be mom. She did, so now I do. If you're looking for some so you can make your own, Amazon seems like it's probably a safe bet (side note: I just checked while I was typing this. Definitely check Amazon.).
The cookie recipe itself is actually something I've had since high school. In my freshman year english class we had to do a "how to" demonstration. Obviously, the girl couldn't fully demonstrate how to make cookies, but she brought the recipe with some samples! Now, this is not designed to be an actual roll out cookie dough recipe, but I did all of the research for you and you can turn pretty much any sugar cookie recipe into one! All you really have to do is chill the dough so that it stiffens to the correct consistency. You can also add more flour, but this recipe is pretty similar to a lot of the ones that I found floating around on the interwebz. I chilled my dough for about 10 minutes, but you'll want to chill yours for longer. Some of my cookies softened around the edges instead of staying in the precise shape they were in when they started. For me, this was no big deal. If you're making these with kids, it's probably no big deal either.
After I noticed that it was happening when I checked on the first batch, I stuck the other sheets in the fridge to chill after they were cut and before they went in the oven. This helped out some, but chilling the dough for longer ahead of time is probably the right thing to do. The trick is to make sure you don't chill it for TOO long - I would think that about 30 minutes to an hour is good enough, because you still need the dough soft enough to work with. I worked with about 1/3 of the dough at a time, and probably could have left the rest of it in the fridge.
I love sugar cookies with frosting, but transporting them the few blocks to my mom's house with buttercream frosting seemed like it posed some problems. I've read about royal icing about a million times on the internet, but never had the opportunity or a reason to try it. Once I started investigating, my main concern was the (uncooked) egg whites called for in most traditional recipes. I was pretty sure that most everybody would be okay, but my gramma is 81 years old and I'm not knowingly going to take any chances with that woman.
Basically, royal icing is the same stuff that you use when you make gingerbread houses. There are lots of different consistencies that you can make by adding more water or more sugar to make it thinner or thicker. "Flood" consistency is pretty much what it sounds like, a thin consistency that you can use to spread a thin layer for decorating. The best part of royal icing is that it dries hard, so you can stack your sugar cookies for easy storage and transport. (For more information and/or a better explanation, I would definitely check out The Shiksa's post on it - I found it tremendously helpful!)
I made mine with meringue powder instead, which is made of dried egg whites, sugar, and gum. I had to go to Walmart (my nemesis) to get it, but I was able to find it pretty easily once I could figure out where the cake decorating/Wilton section was.
After reading about 20 blogs about royal icing, I was prepared for a battle. I was expecting it to be much more difficult than it really was. The hardest part, for me, was getting the icing to the right "flood" consistency, but I think that was really because I was bound and determined to make only one batch and split it up from there, rather than making multiple batches and then wondering the the heck to do with the leftovers. I ended up having to use my (clean!) fingers to spread the icing on some of the smaller cookies, but it definitely worked well. I was a little wary about leaving my cookies out overnight, and while I ended up with a crunchier cookie in the end, none of the bad things I imagined ended up happening.
This exercise made me realize how much of a perfectionist I can be. For me, I was originally unhappy about the cookies losing a little of their shape in the oven. Then, I was like "man I could have decorated these much better!". Then, I called Joe into the room when I was finished and he thought they were awesome. Then, I brought the cookies to my mom's house and made a whole huge thing about keeping them a surprise and not showing them until it was time to eat dessert.
And suddenly, it didn't matter that it took me a couple of days to make these or that I thought the results could have been better. Wanna know why? My family LOVED these cookies - I hope your family does, too!
Easy Sugar Cookies
2 3/4 c. flour
1 tsp. baking soda
1/2 tsp. baking powder
1 c. (2 sticks) butter, room temperature
1 1/2 c. granulated sugar
1 egg
1 tsp vanilla extract
Combine all ingredients. Dough will be thick. Cover and refrigerate for about one hour. Preheat oven to 375°F. Roll out to about 1/4" thick and cut cookies as desired. Bake for 8 minutes or until edges are just starting to turn golden.
Royal Icing
3 Tbsp meringue powder
1 lb. (approx. 4 cups) powdered sugar
1 tsp vanilla extract
1/4 c. warm water, plus more for "flood" consistency icing
In the bowl of a stand mixer fitted with the paddle attachment, combine meringue powder and powdered sugar. Add water and beat on medium-high speed until stiff peaks form, about 5-7 minutes.
Add water or sugar as needed to achieve correct consistency.
Use immediately.
To give you an idea of how large this company is, the owner has about 50 or so dealerships in the greater Boston and Providence areas. The dealerships run the gamut, from Ford and Honda to BMW and Rolls Royce and everything in between.
It's only been a few weeks, but so far, I LOVE it. Surprisingly, even though I have about 400+ new cars that I need to get photographed and online, the job is way less stress than my last one. People are treating me the way I want and deserve to be treated and seem genuinely happy to have me on board. Also, I get to use my education (imagine that!) and have minimal interactions with customers (pretty much just a smile and a friendly hello when I see them in the show room). Also, there's way more upward growth potential at this job. Overall, I'm thrilled.
So. Thanksgiving just passed and we are in the midst of Chanukah. I have done a TON of baking this past week for the holidays, and have much to show you. I thought it would be overwhelming if I did it all once, though, so I'm breaking them down into different posts. I was originally going to do it in the order of which the things were made, but, obviously, Chanukah cookies are relevant and I wanted to share those first. Also, considering my pretty terrible decorating ability, I'm the most proud of these and wanted to show them off!
Since it's just a basic sugar cookie recipe, this also seemed the most timely so that you can plan to make them for Christmas. Before you ask: I have no idea where to go to acquire Jewish themed cookie cutters. I figured if anyone would have them, it would be mom. She did, so now I do. If you're looking for some so you can make your own, Amazon seems like it's probably a safe bet (side note: I just checked while I was typing this. Definitely check Amazon.).
The cookie recipe itself is actually something I've had since high school. In my freshman year english class we had to do a "how to" demonstration. Obviously, the girl couldn't fully demonstrate how to make cookies, but she brought the recipe with some samples! Now, this is not designed to be an actual roll out cookie dough recipe, but I did all of the research for you and you can turn pretty much any sugar cookie recipe into one! All you really have to do is chill the dough so that it stiffens to the correct consistency. You can also add more flour, but this recipe is pretty similar to a lot of the ones that I found floating around on the interwebz. I chilled my dough for about 10 minutes, but you'll want to chill yours for longer. Some of my cookies softened around the edges instead of staying in the precise shape they were in when they started. For me, this was no big deal. If you're making these with kids, it's probably no big deal either.
After I noticed that it was happening when I checked on the first batch, I stuck the other sheets in the fridge to chill after they were cut and before they went in the oven. This helped out some, but chilling the dough for longer ahead of time is probably the right thing to do. The trick is to make sure you don't chill it for TOO long - I would think that about 30 minutes to an hour is good enough, because you still need the dough soft enough to work with. I worked with about 1/3 of the dough at a time, and probably could have left the rest of it in the fridge.
I love sugar cookies with frosting, but transporting them the few blocks to my mom's house with buttercream frosting seemed like it posed some problems. I've read about royal icing about a million times on the internet, but never had the opportunity or a reason to try it. Once I started investigating, my main concern was the (uncooked) egg whites called for in most traditional recipes. I was pretty sure that most everybody would be okay, but my gramma is 81 years old and I'm not knowingly going to take any chances with that woman.
Basically, royal icing is the same stuff that you use when you make gingerbread houses. There are lots of different consistencies that you can make by adding more water or more sugar to make it thinner or thicker. "Flood" consistency is pretty much what it sounds like, a thin consistency that you can use to spread a thin layer for decorating. The best part of royal icing is that it dries hard, so you can stack your sugar cookies for easy storage and transport. (For more information and/or a better explanation, I would definitely check out The Shiksa's post on it - I found it tremendously helpful!)
I made mine with meringue powder instead, which is made of dried egg whites, sugar, and gum. I had to go to Walmart (my nemesis) to get it, but I was able to find it pretty easily once I could figure out where the cake decorating/Wilton section was.
After reading about 20 blogs about royal icing, I was prepared for a battle. I was expecting it to be much more difficult than it really was. The hardest part, for me, was getting the icing to the right "flood" consistency, but I think that was really because I was bound and determined to make only one batch and split it up from there, rather than making multiple batches and then wondering the the heck to do with the leftovers. I ended up having to use my (clean!) fingers to spread the icing on some of the smaller cookies, but it definitely worked well. I was a little wary about leaving my cookies out overnight, and while I ended up with a crunchier cookie in the end, none of the bad things I imagined ended up happening.
This exercise made me realize how much of a perfectionist I can be. For me, I was originally unhappy about the cookies losing a little of their shape in the oven. Then, I was like "man I could have decorated these much better!". Then, I called Joe into the room when I was finished and he thought they were awesome. Then, I brought the cookies to my mom's house and made a whole huge thing about keeping them a surprise and not showing them until it was time to eat dessert.
And suddenly, it didn't matter that it took me a couple of days to make these or that I thought the results could have been better. Wanna know why? My family LOVED these cookies - I hope your family does, too!
Easy Sugar Cookies
2 3/4 c. flour
1 tsp. baking soda
1/2 tsp. baking powder
1 c. (2 sticks) butter, room temperature
1 1/2 c. granulated sugar
1 egg
1 tsp vanilla extract
Combine all ingredients. Dough will be thick. Cover and refrigerate for about one hour. Preheat oven to 375°F. Roll out to about 1/4" thick and cut cookies as desired. Bake for 8 minutes or until edges are just starting to turn golden.
Royal Icing
3 Tbsp meringue powder
1 lb. (approx. 4 cups) powdered sugar
1 tsp vanilla extract
1/4 c. warm water, plus more for "flood" consistency icing
In the bowl of a stand mixer fitted with the paddle attachment, combine meringue powder and powdered sugar. Add water and beat on medium-high speed until stiff peaks form, about 5-7 minutes.
Add water or sugar as needed to achieve correct consistency.
Use immediately.
Monday, October 21, 2013
White Chocolate Cranberry Cookies
I've been dying to make something "seasonal", like apple or pumpkin, but Joe is only "meh" on pumpkin things and I keep eating the apples before I can make anything with them. I bought some cranberries to put in my salad and had some left, so I wanted to use them in something. They're pretty seasonal but also a little tart, so I thought they'd be perfect in something a little sweeter.
We've been on a huge cookie kick (try saying that three times fast!) lately, and when I realized I had some white chocolate chips hanging around in the cabinet, I thought this would be a perfect way to make something with some unexpected seasonal flavors.
I only made a half batch of these cookies, mostly because I wasn't sure if Joe was going to like them. Turns out, I should have made a full batch, because I barely had time to take the few photos you see here before he started stuffing them in his face a la Cookie Monster. Since you'll probably want to make more, simply double (or triple) the recipe that you see below.
The sweetness of the white chocolate is a really nice balance to the tart flavor of the cranberries. I've only been able to have a few, but I think these would be PERFECT with a nice tall glass of milk. The way the holidays fall this year, my family will be celebrating Chanukagiving (Chanukah starts at nightfall on Thanksgiving), and I'm already thinking that these will make a perfect holiday dessert.
What are your favorite seasonal flavors?
White Chocolate Cranberry Cookies
To print this recipe, click here
1 stick butter, room temperature
1/2 c. granulated sugar
1/2 c. brown sugar
1 egg
1 tsp. vanilla extract
1 tsp. baking soda
1 1/2 c. all purpose flour
1 c. white chocolate chips
1 c. dried cranberries
Combine all ingredients except for flour, cranberries and chocolate chips.
Mix in flour until thoroughly combined. Add in chocolate chips and cranberries.
Drop by rounded tablespoon onto greased baking sheet. Bake for 9 minutes. Let cool on baking sheets for 2 minutes, then transfer to a wire rack to cool completely.
We've been on a huge cookie kick (try saying that three times fast!) lately, and when I realized I had some white chocolate chips hanging around in the cabinet, I thought this would be a perfect way to make something with some unexpected seasonal flavors.
I only made a half batch of these cookies, mostly because I wasn't sure if Joe was going to like them. Turns out, I should have made a full batch, because I barely had time to take the few photos you see here before he started stuffing them in his face a la Cookie Monster. Since you'll probably want to make more, simply double (or triple) the recipe that you see below.
The sweetness of the white chocolate is a really nice balance to the tart flavor of the cranberries. I've only been able to have a few, but I think these would be PERFECT with a nice tall glass of milk. The way the holidays fall this year, my family will be celebrating Chanukagiving (Chanukah starts at nightfall on Thanksgiving), and I'm already thinking that these will make a perfect holiday dessert.
What are your favorite seasonal flavors?
White Chocolate Cranberry Cookies
To print this recipe, click here
1 stick butter, room temperature
1/2 c. granulated sugar
1/2 c. brown sugar
1 egg
1 tsp. vanilla extract
1 tsp. baking soda
1 1/2 c. all purpose flour
1 c. white chocolate chips
1 c. dried cranberries
Combine all ingredients except for flour, cranberries and chocolate chips.
Mix in flour until thoroughly combined. Add in chocolate chips and cranberries.
Drop by rounded tablespoon onto greased baking sheet. Bake for 9 minutes. Let cool on baking sheets for 2 minutes, then transfer to a wire rack to cool completely.
Labels:
cookies
Wednesday, August 14, 2013
Jello Cookies
I know. I haven't posted in almost a month! There are a few reasons for that. First, even though I have a few things that I haven't shared yet, I don't bake as much in the summer (I might have mentioned this last time, too), so I'm trying to space things out so that I can continue to post on a somewhat regular basis. Also, if you know me in real life, you know that I have a really difficult time sharing my recipes with people. I don't care if you're my mother, my best friend or a stranger on the street - I'm happy that you love my cooking, but the second you ask me for the recipe, I get all weird and clammy. You can see how it's difficult for someone like that to have a blog where they share their favorite recipes.
The other reason I haven't posted - and trust me, this one is more important and way cooler - is that I think I finally have a way to get Elfie's Edibles off the ground. I don't want to jinx it and I don't have any details to really talk about it, but, if I'm going to regularly be baking for strangers, I'm not sure how I feel about posting the actual recipes. Pictures and stories, sure, but I'm not sure what benefit would be in it for me if my customers can easily find and reproduce (or at least try to reproduce) whatever I just made for them. I know I'm walking a very fine line, here, but I think I can manage it - with your patience and input, of course!
Now that that's out of the way, I want to share something I made with you! There's no actual recipe for this one, as I've seen about a million different versions floating around on Facebook and on Pinterest. These Jello cookies kept popping up everywhere and they looked and sounded delicious, so I felt like I had to try to make them. I looked at a few different recipes and they're all pretty much the same, so I just made whatever one I found at the time.
Whatever recipe you choose, these are REALLY easy to make! After you make the dough, divide it into a number of smaller amounts based on the different flavors of Jello you have. Add a few tablespoons to each smaller portion of dough, mix thoroughly and bake for about 8 minutes. When they come out of the oven, tap the tops of each cookie with the bottom of a glass to flatten them out a little, and voila! Jello cookies!
NOTE: here's an easy way to make these:, make chocolate chip cookie dough. Omit the chocolate chips and brown sugar, and use increase the flour by 1 cup. Drop by rounded spoonful or roll into balls, then bake at 350°F for about 9 minutes. They will spread out, so make sure you leave some space between them!
Here's the thing: these cookies are super sweet. My recipe said to roll the dough balls into the extra Jello before baking, and I easily could have skipped that step and still had tons of the Jello flavor. I guess I never realized just how sweet Jello is, because you could easily cut back a little on the sugar, and the cookies wouldn't suffer. You can add a little food coloring to increase the color vibrancy if you want, but I found it wasn't necessary. I used 3 tablespoons of each flavor and let the Jello sit on top of the dough for a couple of minutes before I mixing it in, so maybe that's why my colors were so bright.
As you can see from the picture, I made four different flavors: grape, lime, orange and cherry. The grape was my least favorite, and I think I actually liked the orange the best. If you put a small scoop of vanilla ice cream between two of the orange cookies, it sort of takes like a creamsicle :)
Since I saw these mostly on Facebook and have had mixed results with Pinterest, I wasn't entirely sure what to expect. But, I was pleasantly surprised with how these came out!
What's the last recipe you made that you found on Facebook?
The other reason I haven't posted - and trust me, this one is more important and way cooler - is that I think I finally have a way to get Elfie's Edibles off the ground. I don't want to jinx it and I don't have any details to really talk about it, but, if I'm going to regularly be baking for strangers, I'm not sure how I feel about posting the actual recipes. Pictures and stories, sure, but I'm not sure what benefit would be in it for me if my customers can easily find and reproduce (or at least try to reproduce) whatever I just made for them. I know I'm walking a very fine line, here, but I think I can manage it - with your patience and input, of course!
Now that that's out of the way, I want to share something I made with you! There's no actual recipe for this one, as I've seen about a million different versions floating around on Facebook and on Pinterest. These Jello cookies kept popping up everywhere and they looked and sounded delicious, so I felt like I had to try to make them. I looked at a few different recipes and they're all pretty much the same, so I just made whatever one I found at the time.
Whatever recipe you choose, these are REALLY easy to make! After you make the dough, divide it into a number of smaller amounts based on the different flavors of Jello you have. Add a few tablespoons to each smaller portion of dough, mix thoroughly and bake for about 8 minutes. When they come out of the oven, tap the tops of each cookie with the bottom of a glass to flatten them out a little, and voila! Jello cookies!
NOTE: here's an easy way to make these:, make chocolate chip cookie dough. Omit the chocolate chips and brown sugar, and use increase the flour by 1 cup. Drop by rounded spoonful or roll into balls, then bake at 350°F for about 9 minutes. They will spread out, so make sure you leave some space between them!
Here's the thing: these cookies are super sweet. My recipe said to roll the dough balls into the extra Jello before baking, and I easily could have skipped that step and still had tons of the Jello flavor. I guess I never realized just how sweet Jello is, because you could easily cut back a little on the sugar, and the cookies wouldn't suffer. You can add a little food coloring to increase the color vibrancy if you want, but I found it wasn't necessary. I used 3 tablespoons of each flavor and let the Jello sit on top of the dough for a couple of minutes before I mixing it in, so maybe that's why my colors were so bright.
As you can see from the picture, I made four different flavors: grape, lime, orange and cherry. The grape was my least favorite, and I think I actually liked the orange the best. If you put a small scoop of vanilla ice cream between two of the orange cookies, it sort of takes like a creamsicle :)
Since I saw these mostly on Facebook and have had mixed results with Pinterest, I wasn't entirely sure what to expect. But, I was pleasantly surprised with how these came out!
What's the last recipe you made that you found on Facebook?
Labels:
cookies
Thursday, April 25, 2013
Springtime Cookie Fun
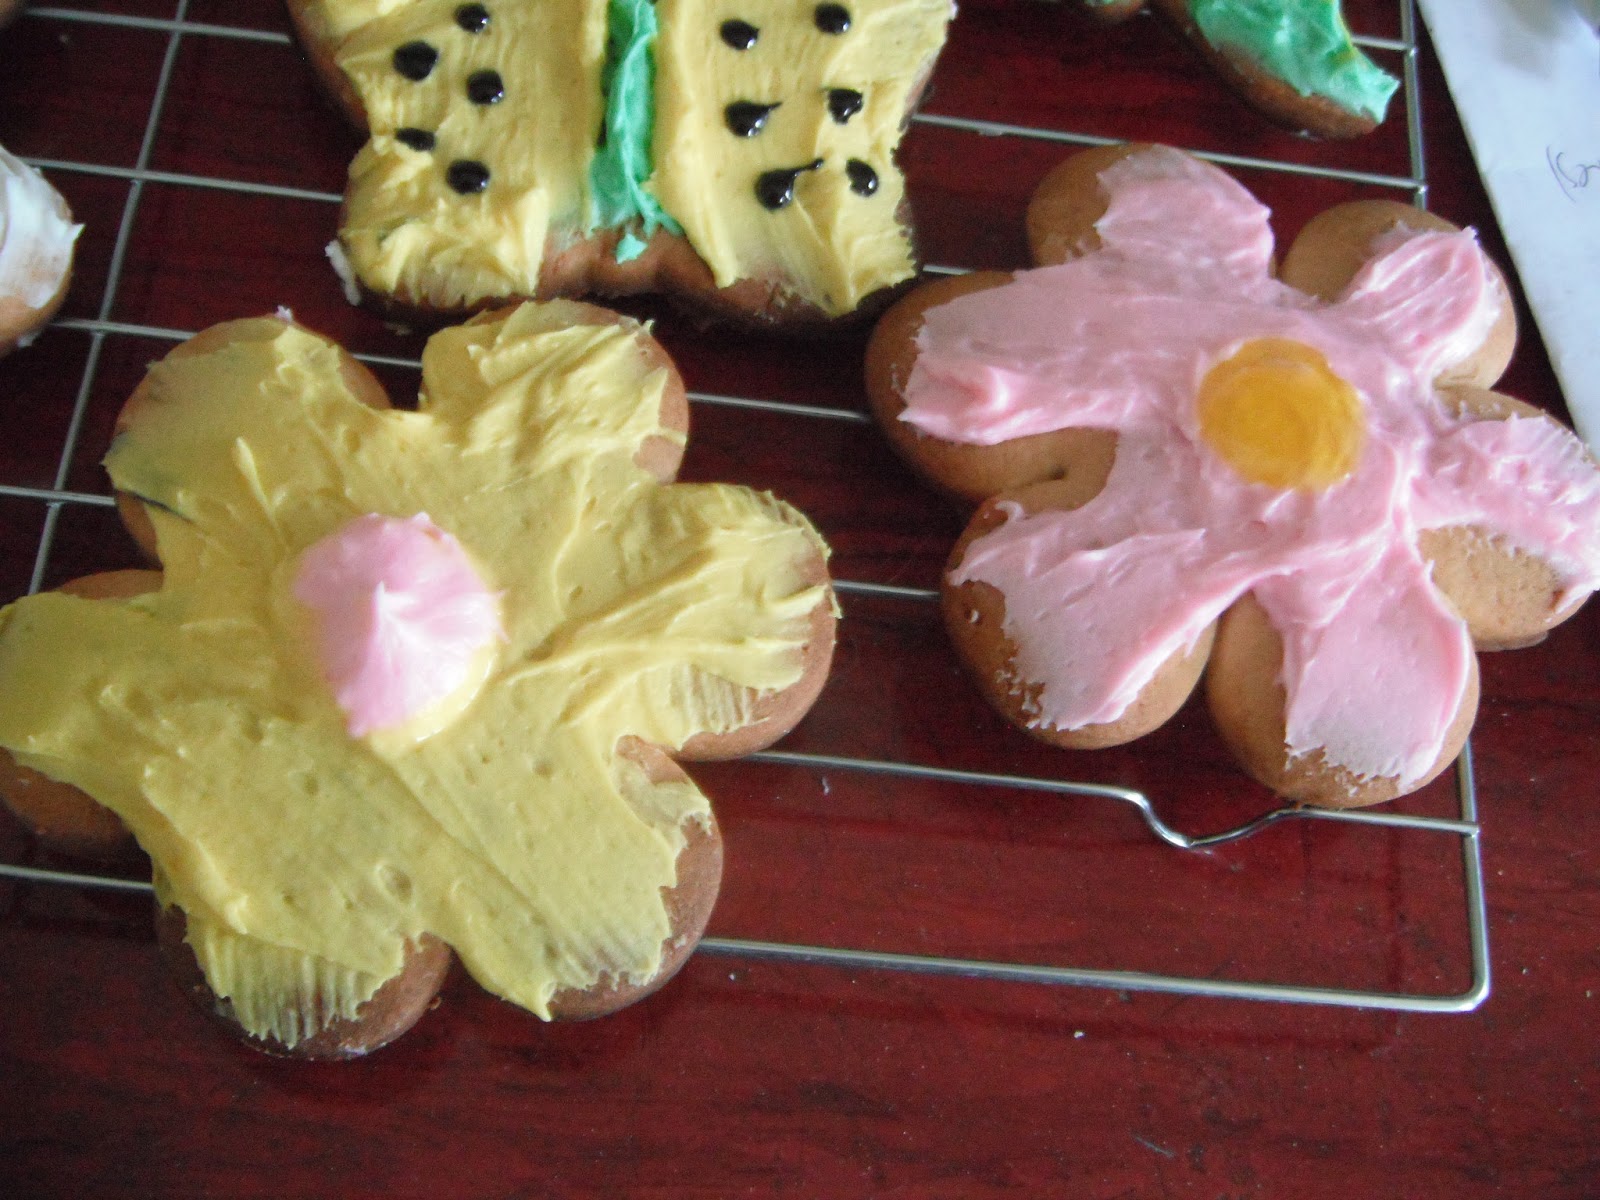
No recipe for this one, but I wanted to share some cookies that I made (OK, Joe helped) to celebrate spring finally arriving.
He'll probably kill me for saying this, but Joe and I decorated these together... and it was actually really fun! I'm usually the person in the kitchen who's all "get out of my way!" but we cut out, baked and decorated the cookies without baring any teeth.
Check them out!
Wanna guess which ones I decorated?
He'll probably kill me for saying this, but Joe and I decorated these together... and it was actually really fun! I'm usually the person in the kitchen who's all "get out of my way!" but we cut out, baked and decorated the cookies without baring any teeth.
Check them out!
Wanna guess which ones I decorated?
| Photobombing my own cookies |
| Just a small sampling - we made about 3 dozen cookies total |
| Little Bunny Foo Foo |
| Reptar! |
| Butterflies |
| And, of course, daisies |
| See that pink spot? That's a belly button. |
| Awww |
| Happy Go Ducky! |
| Group shot of some of my favorites |
Subscribe to:
Posts (Atom)


.jpg)


.jpg)


.jpg)


.jpg)
.jpg)